

The National Institute of Certified Floor-Covering Inspectors (NICFI) is a
non-profit association of independent floor covering inspectors. NICFI members are expert flooring failure analysts and expert witnesses in flooring problems and failures.
NICFI members are experienced in the inspection and failure analysis of
woven carpet, broadloom carpet, resilient tile, rubber tile, cork tile, ceramic tile, resilient sheet vinyl, vinyl composition tile, LVT, hardwood, laminate, solid vinyl,
and specialty flooring materials.
NICFI members attend the annual NICFI Convention in Dalton, Georgia, to increase their knowledge and update their skills. The Annual Convention includes updates on indicative field testing
procedures, tools, products and product defects. The NICFI is the only Non-Profit Association in the Flooring Industry with membership comprised solely of Certified Floor Covering Inspectors.


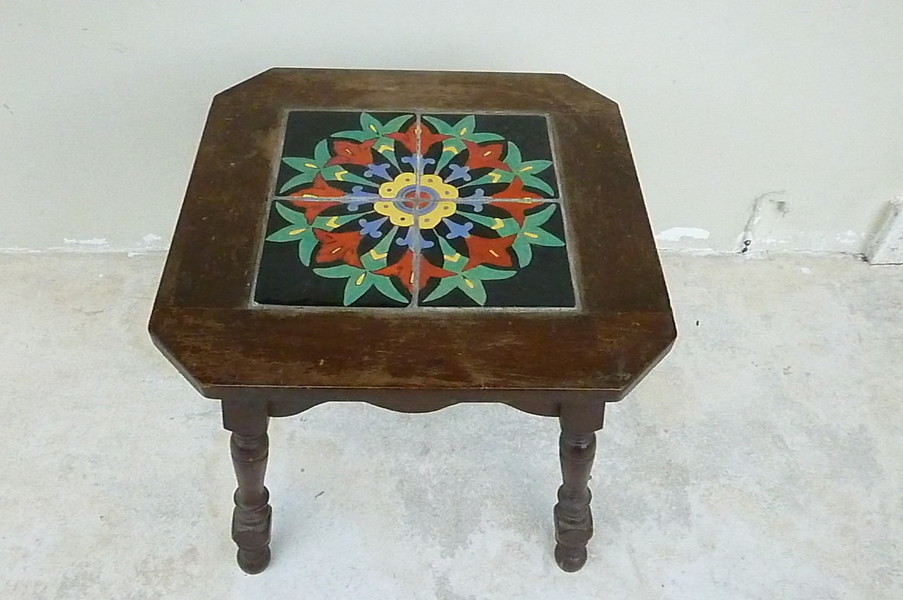
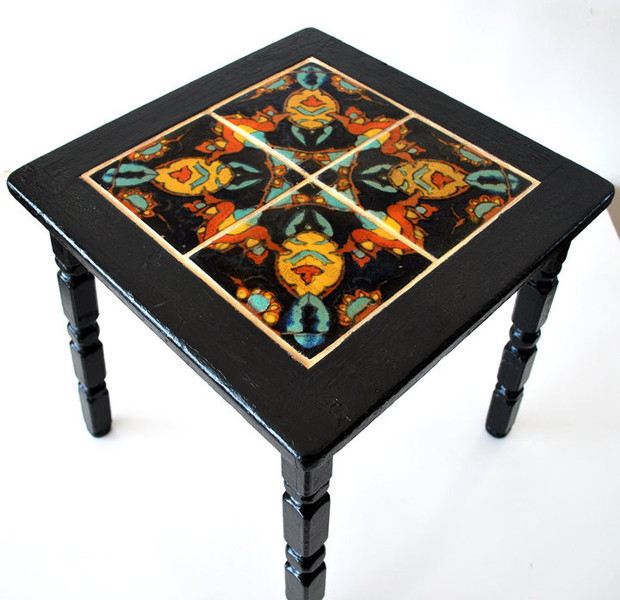
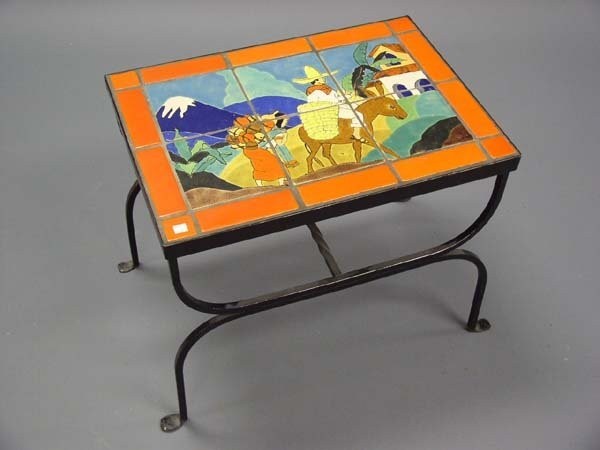
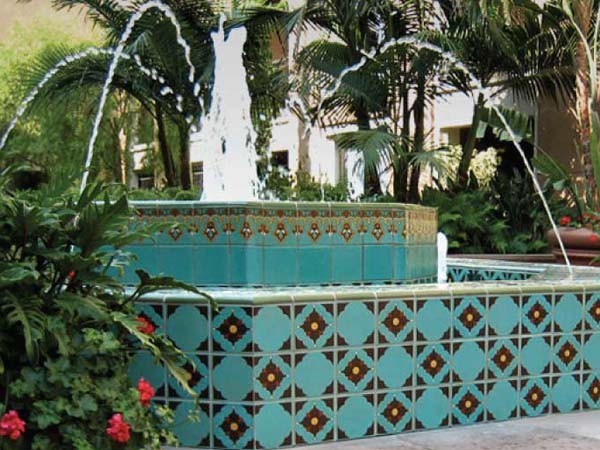
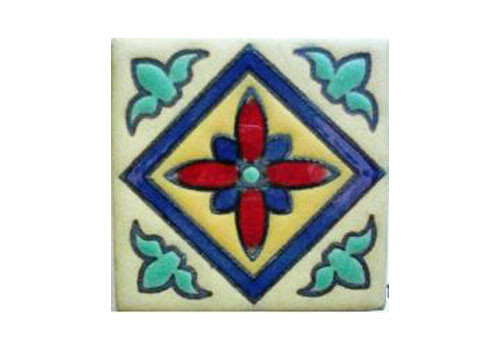
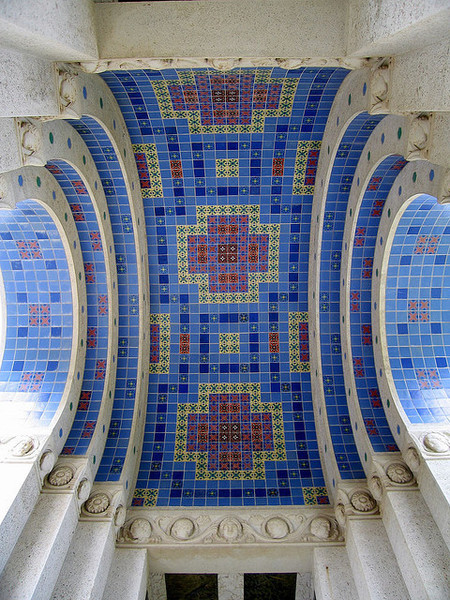
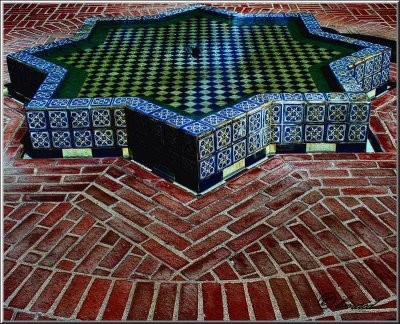
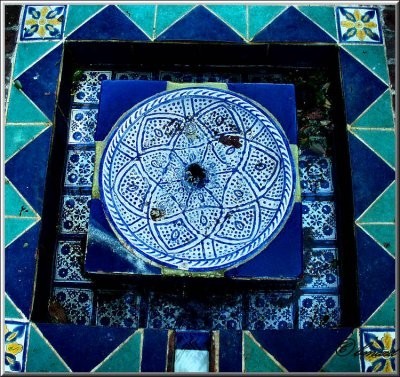
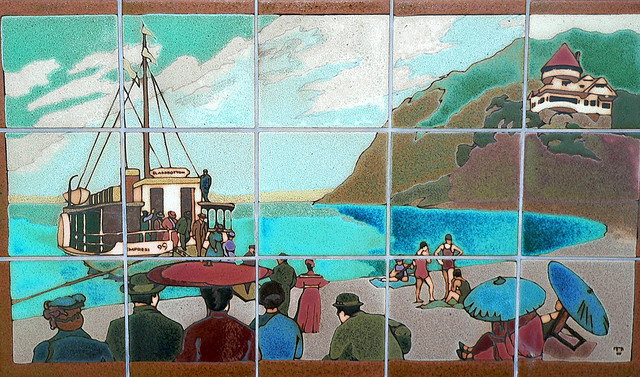
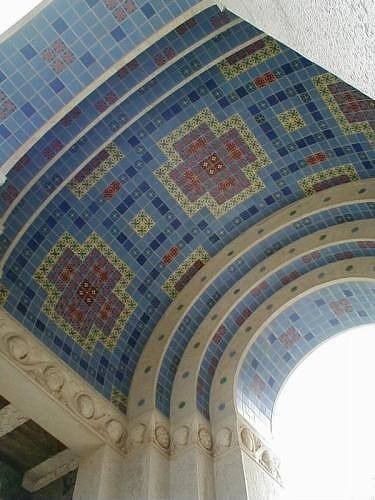
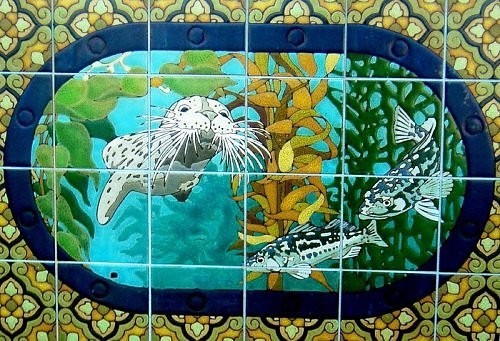
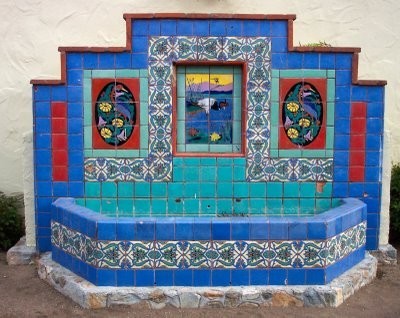
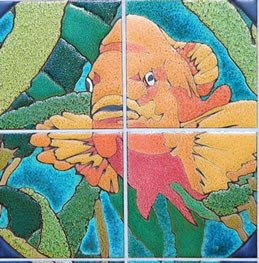
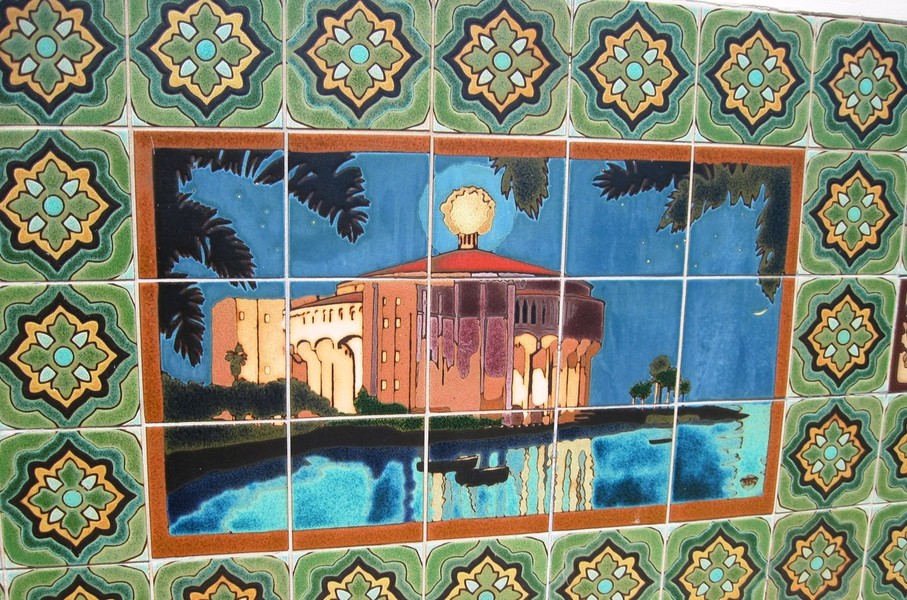
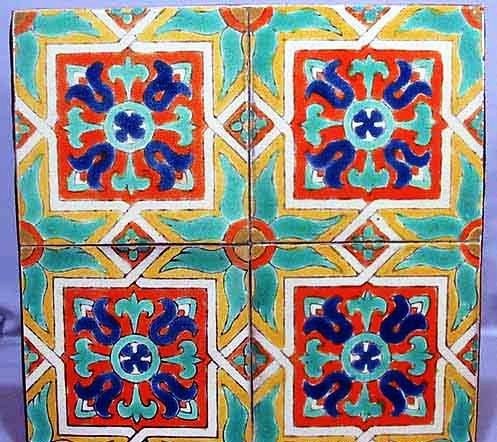
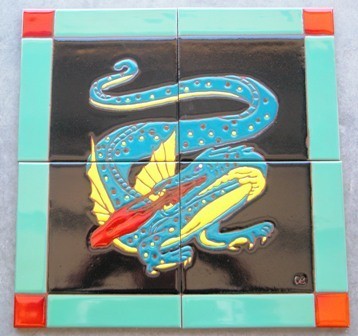
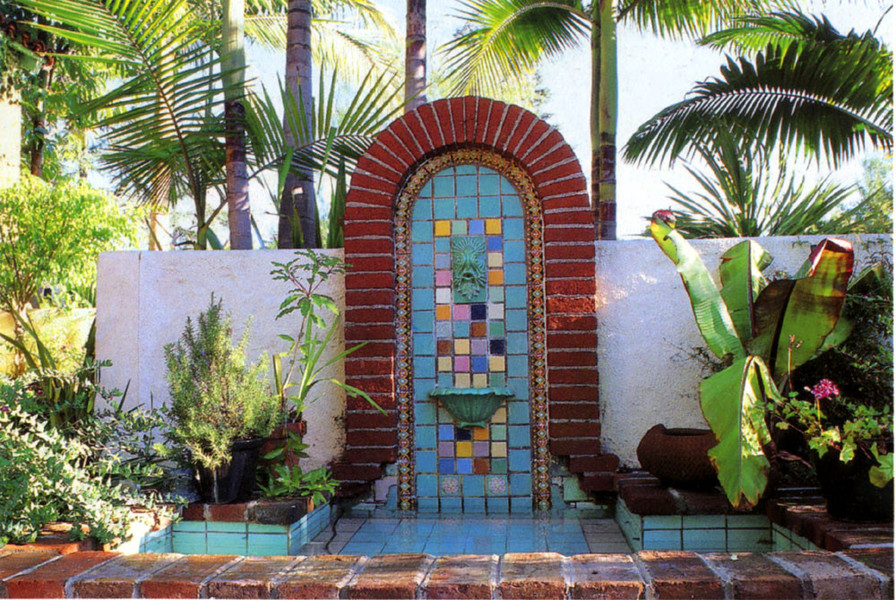
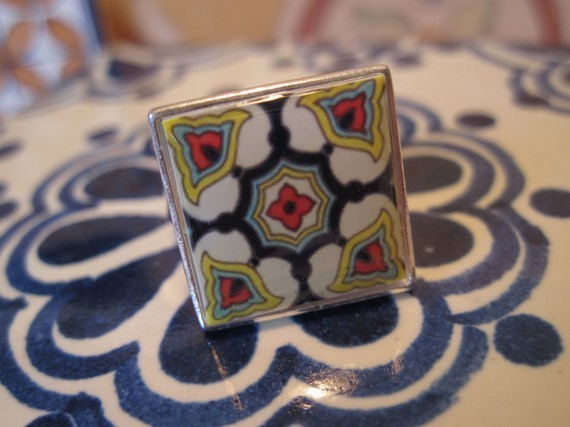
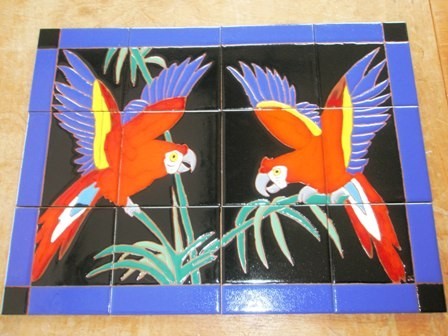
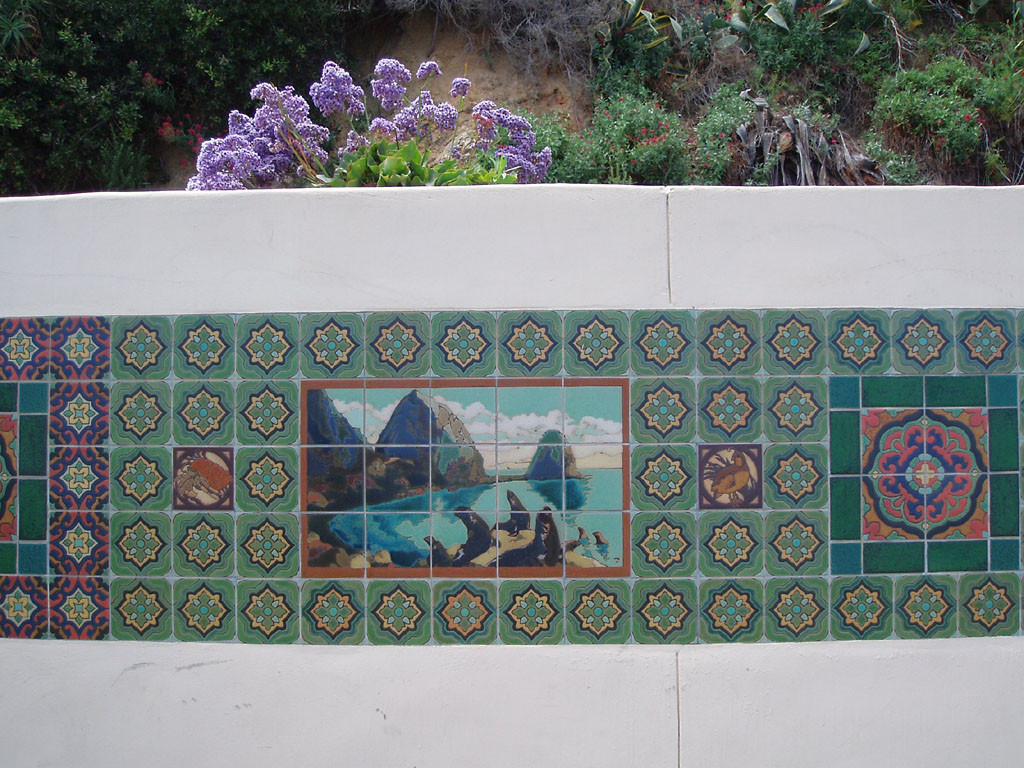
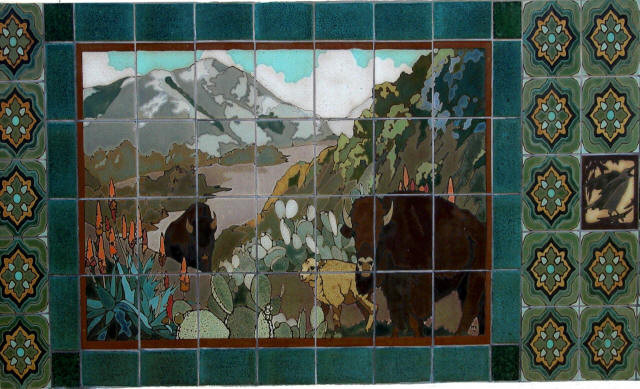
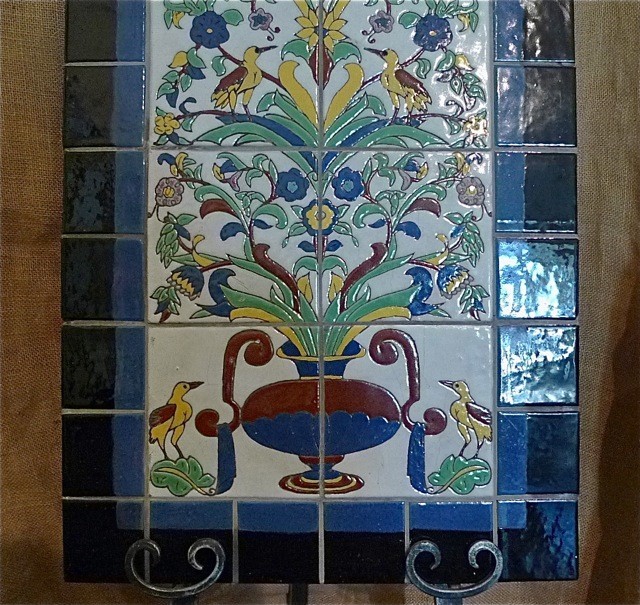
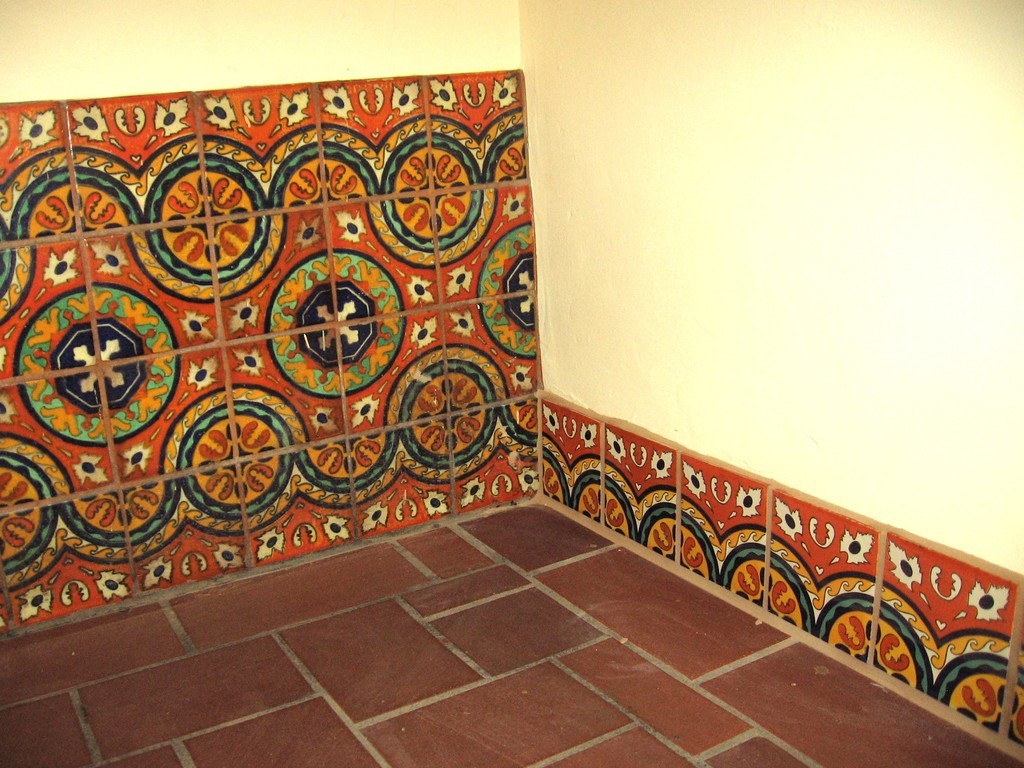
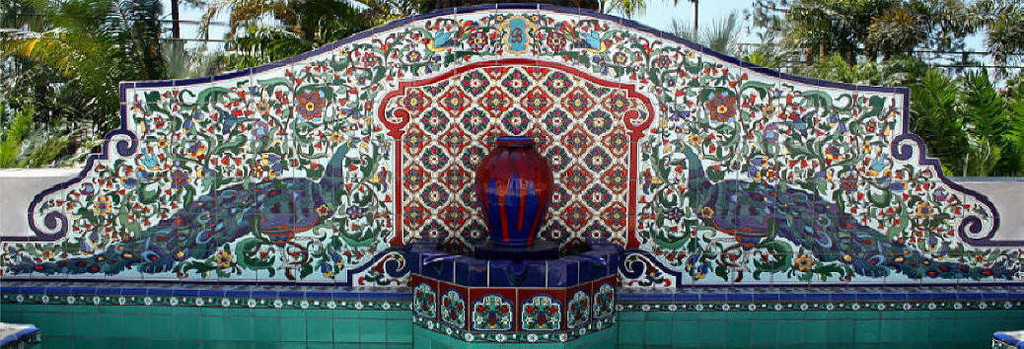
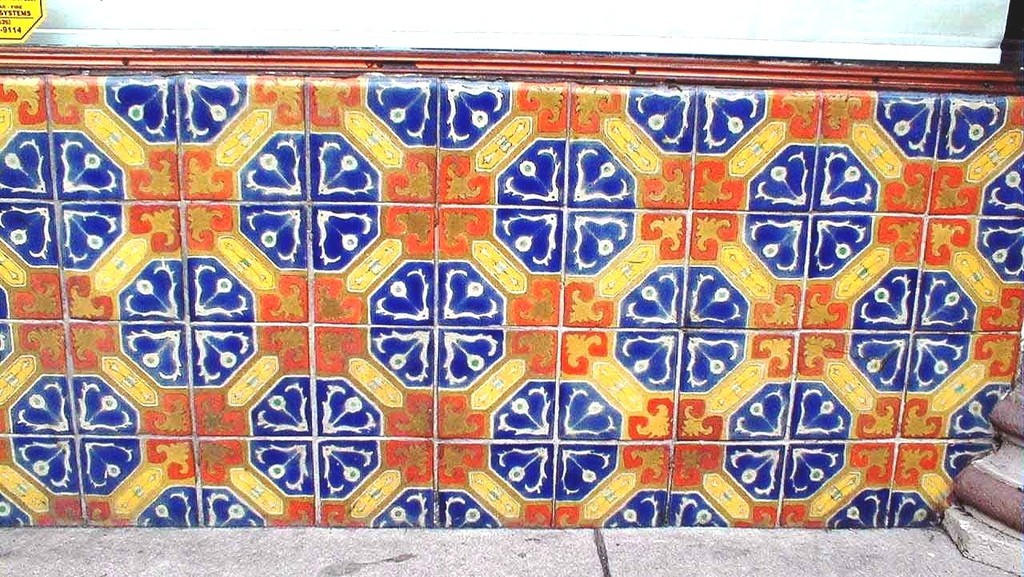
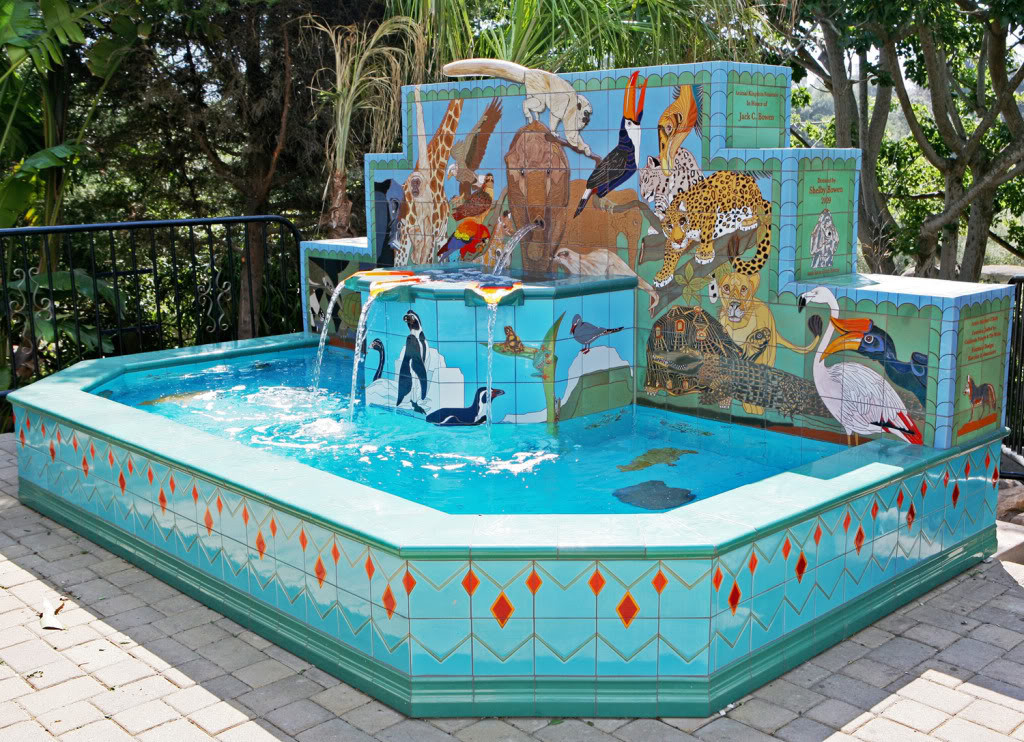
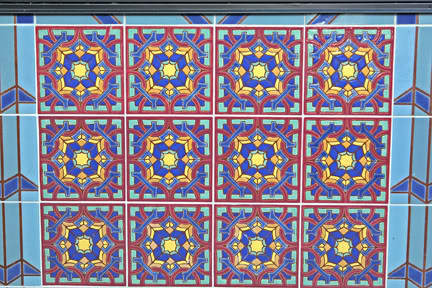
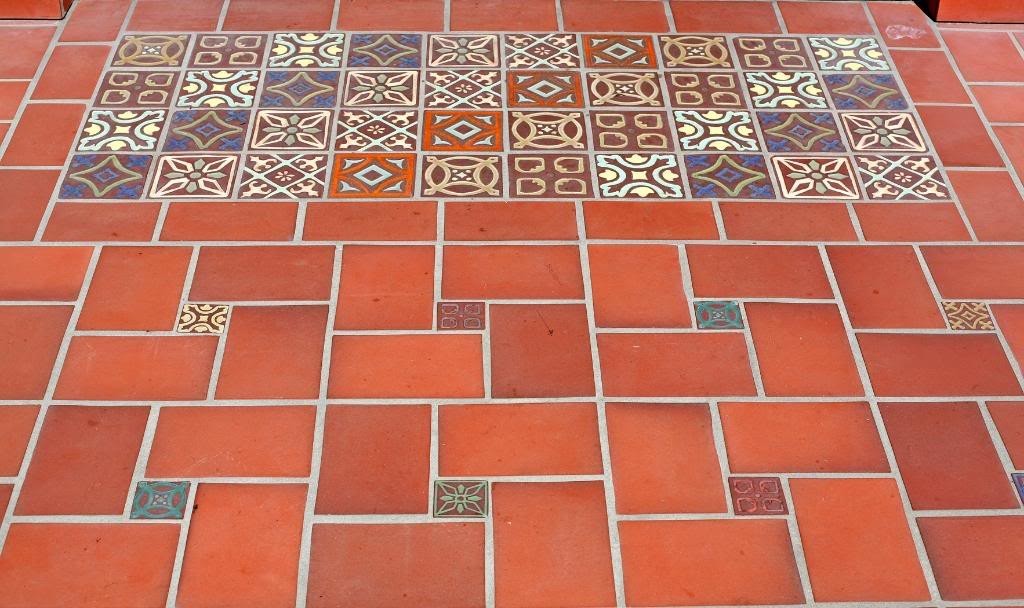
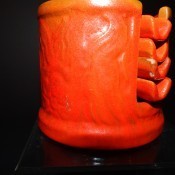
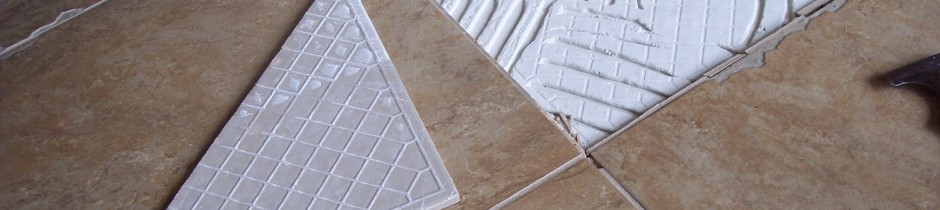
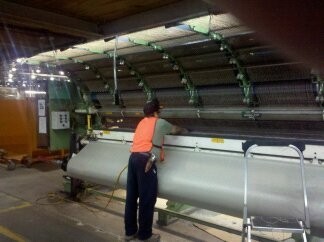
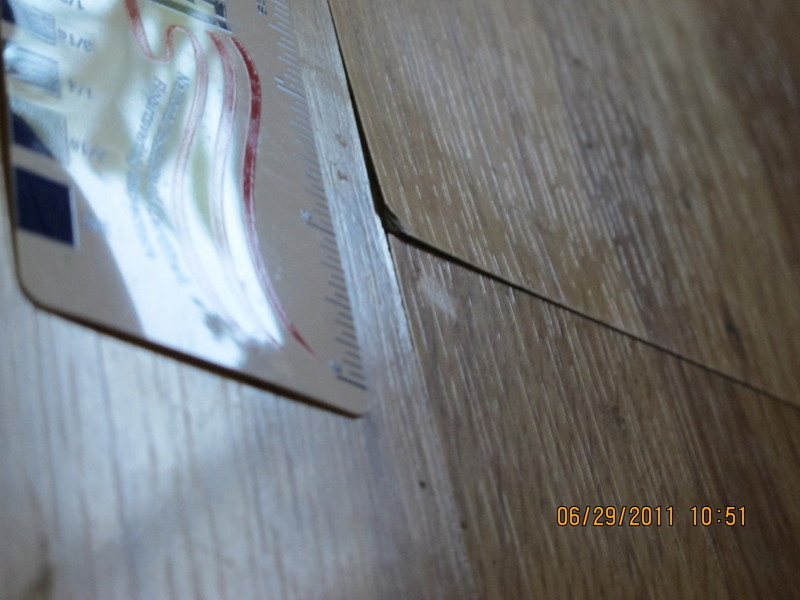
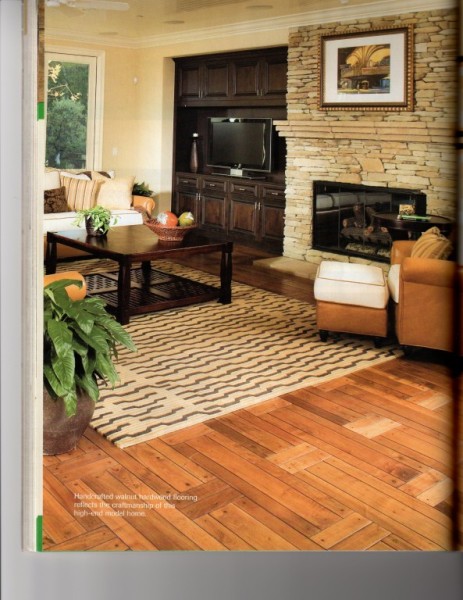
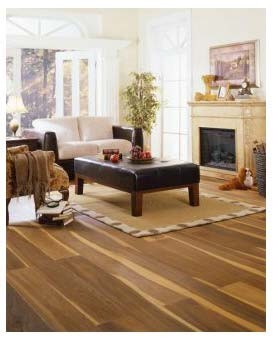
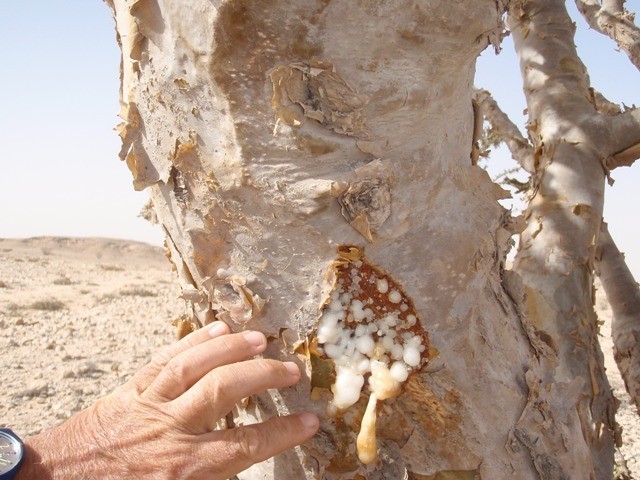
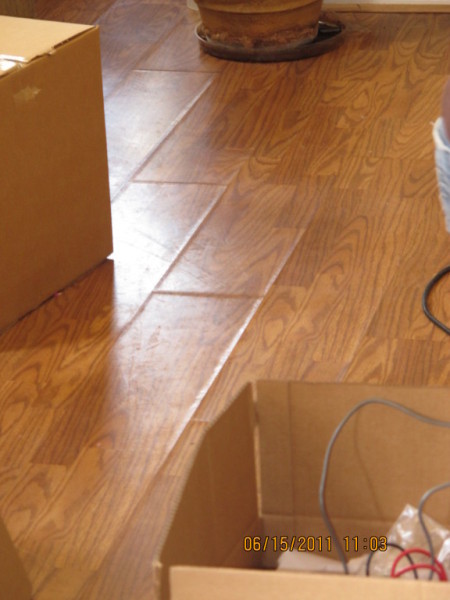
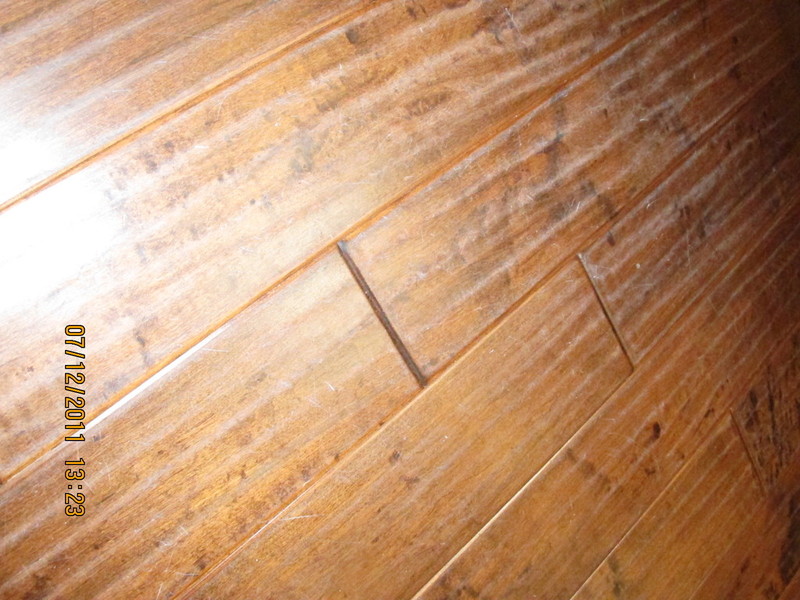
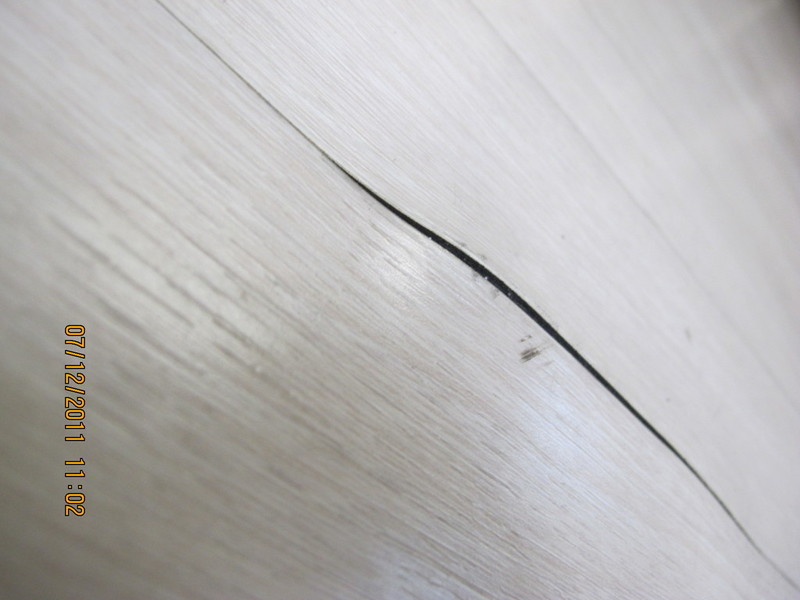
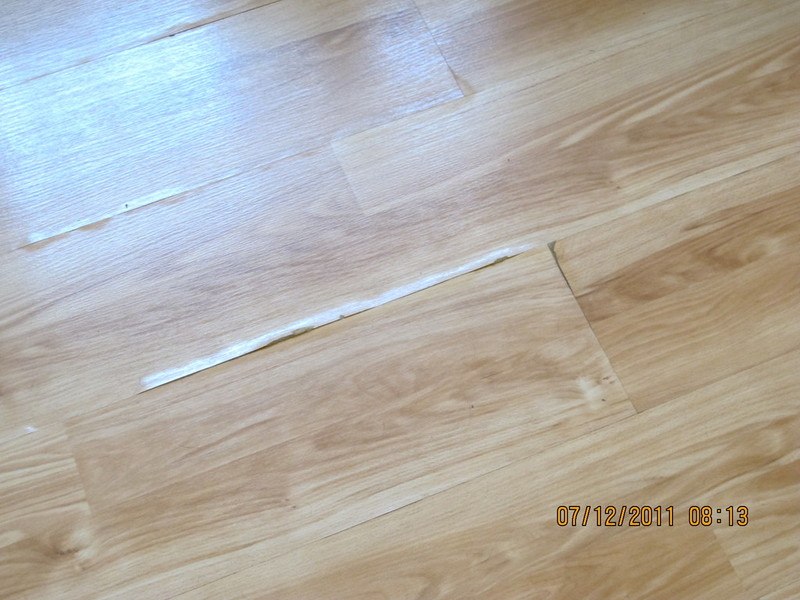
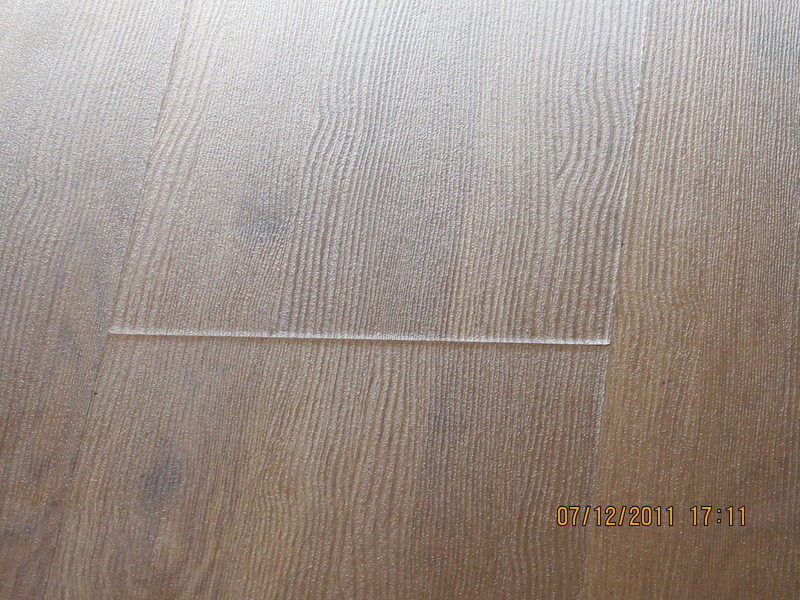
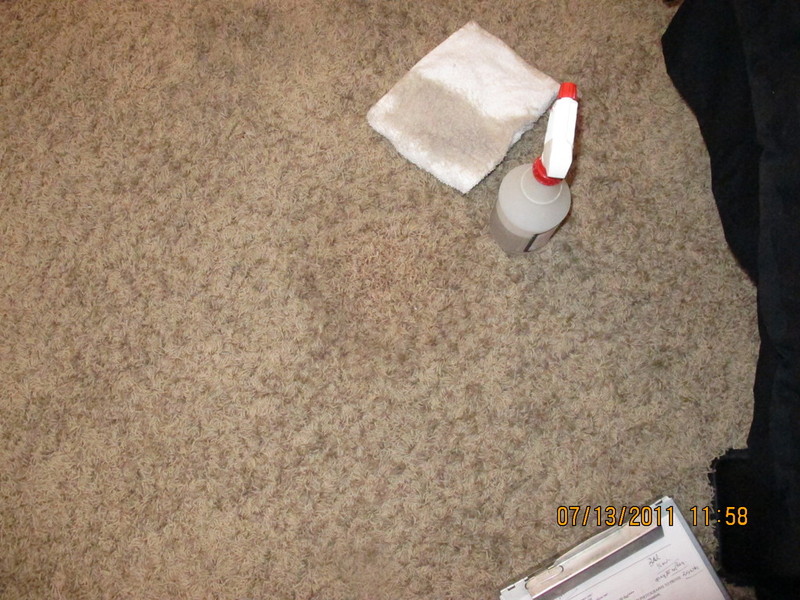
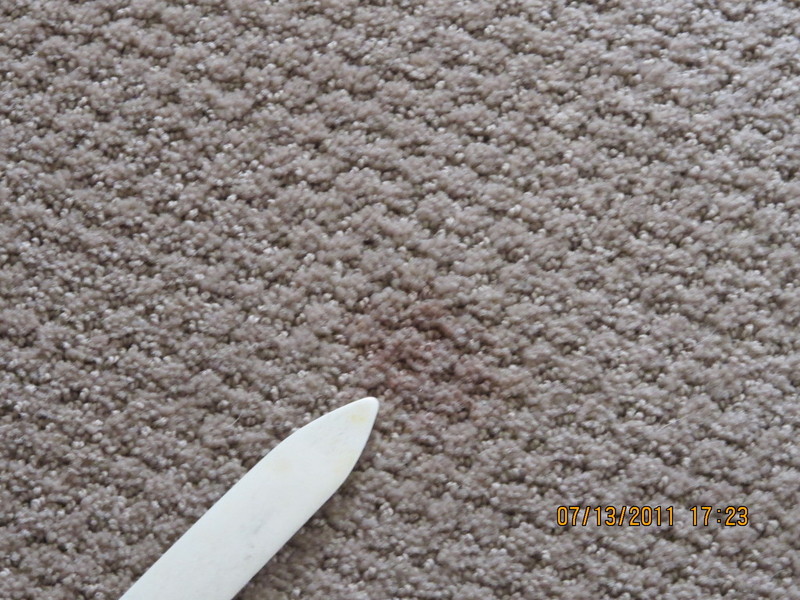
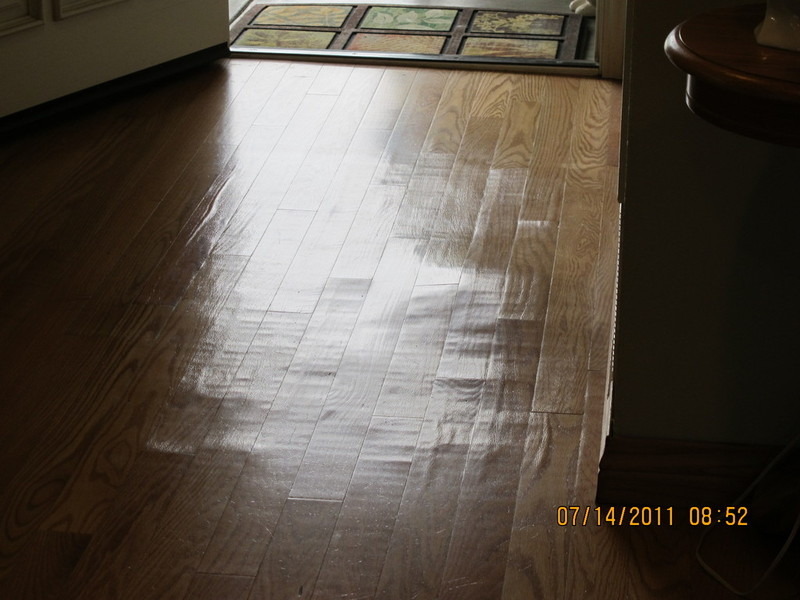
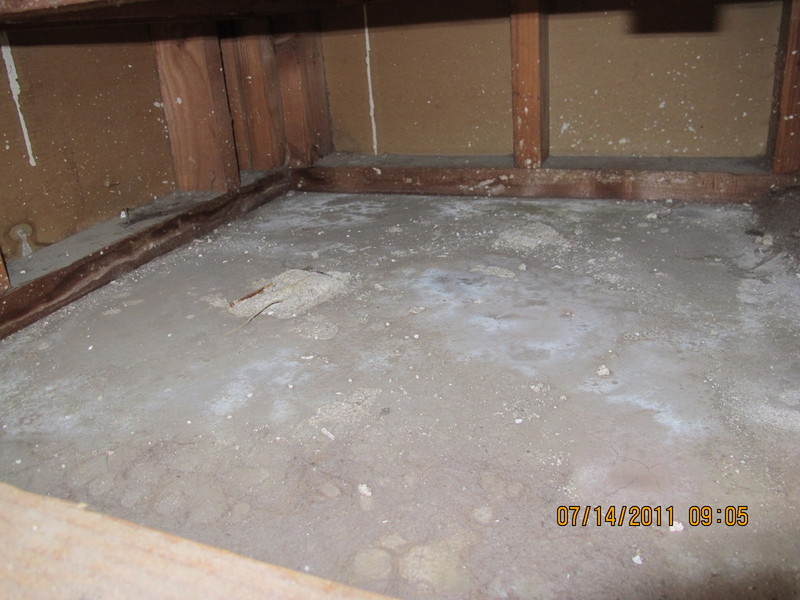
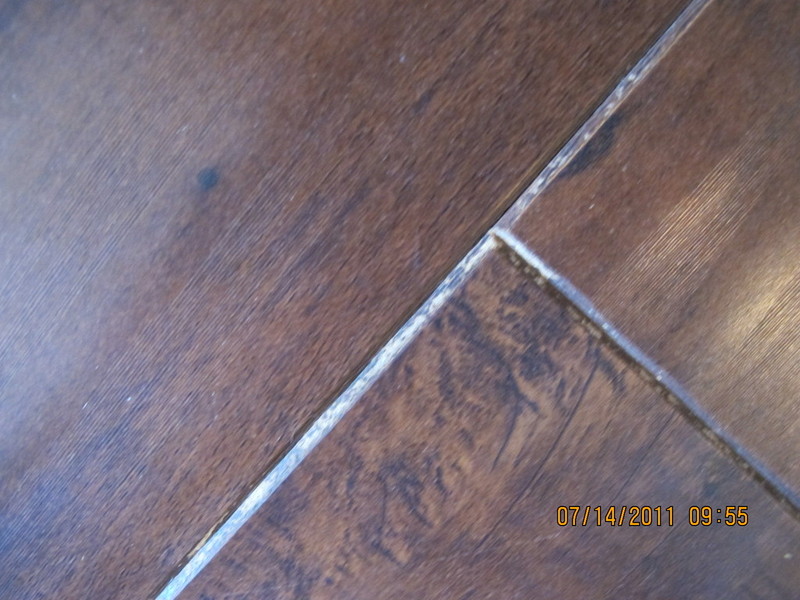
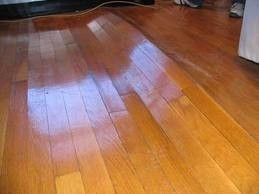
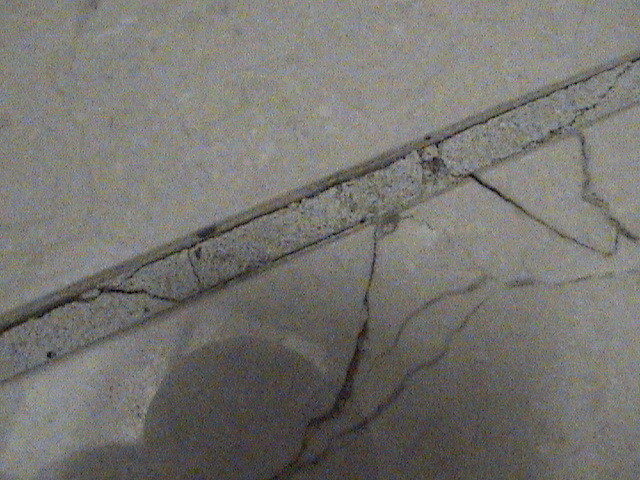
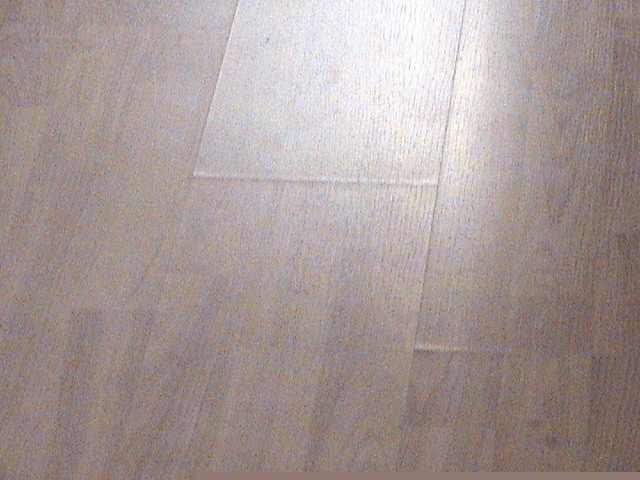
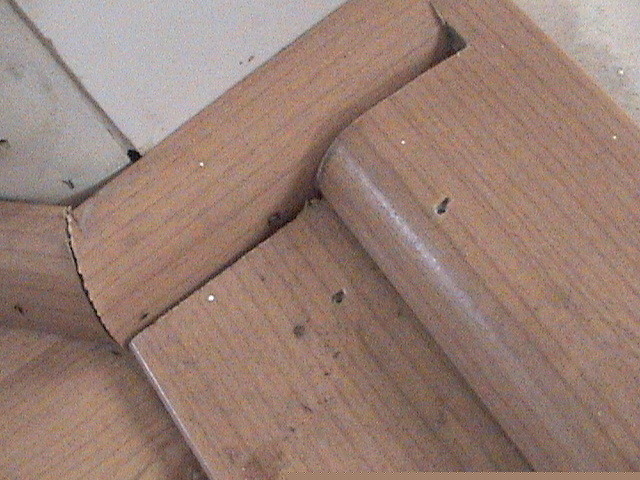
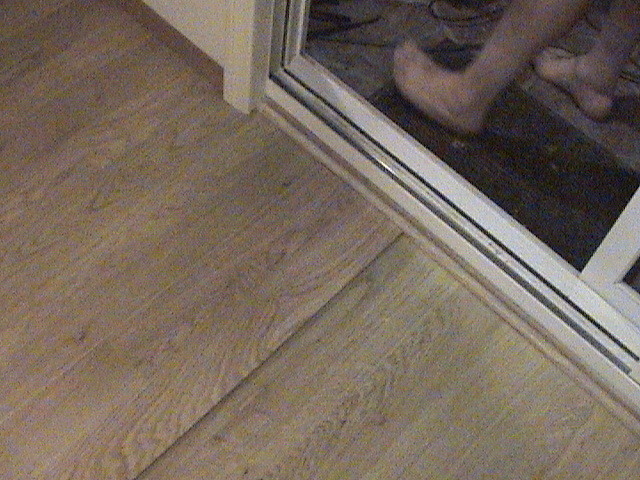
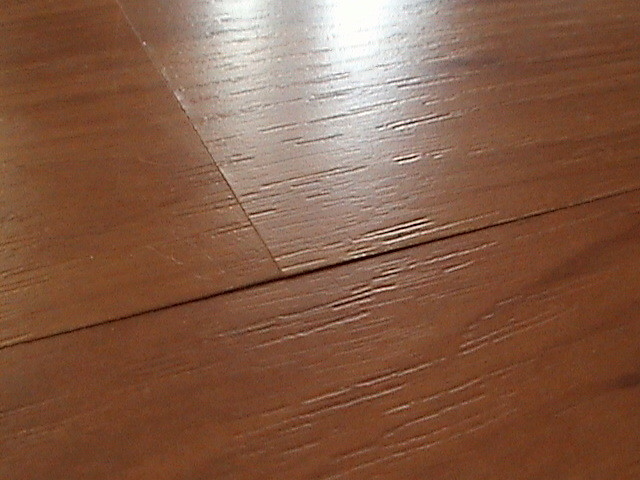
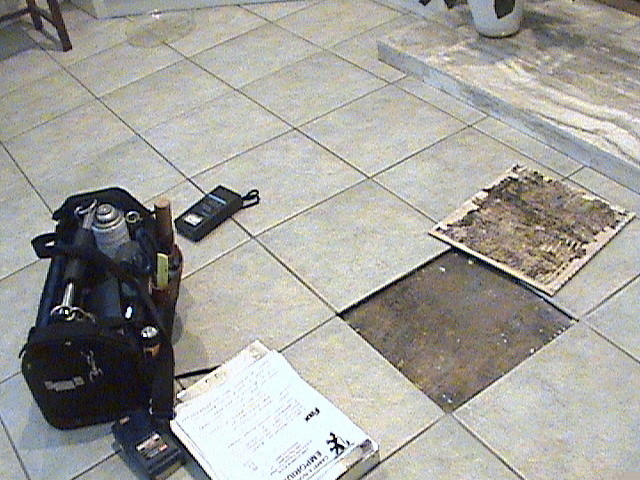
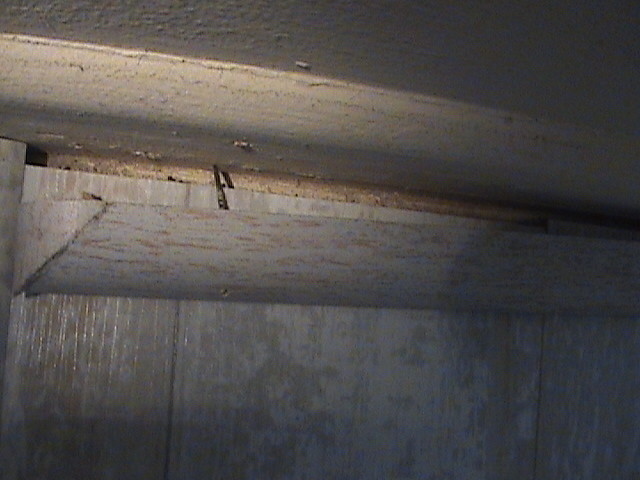
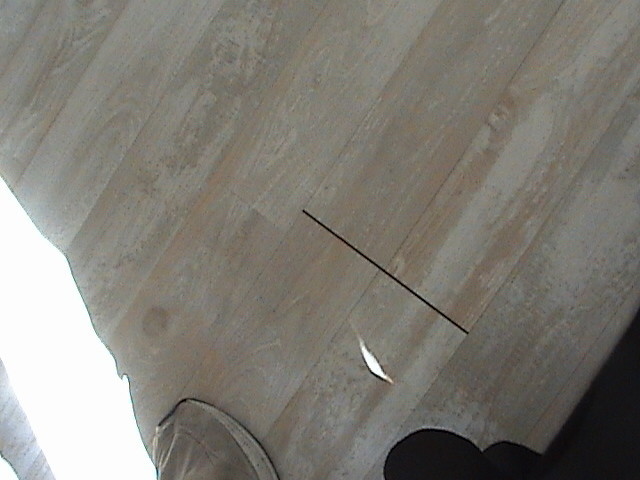
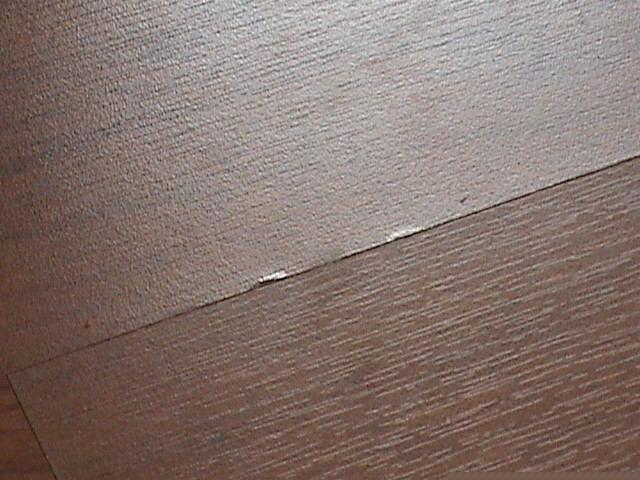
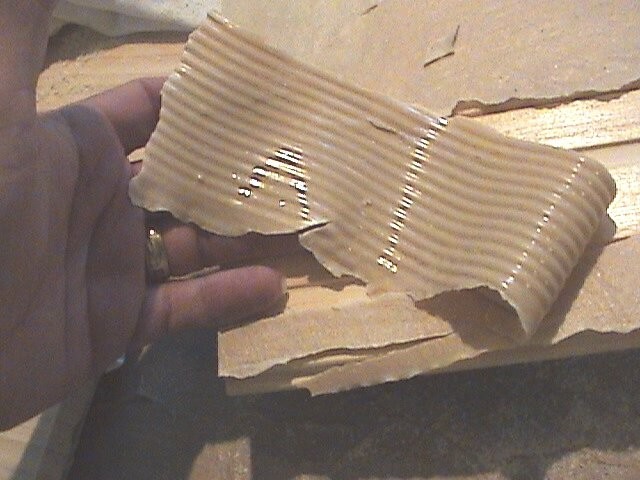
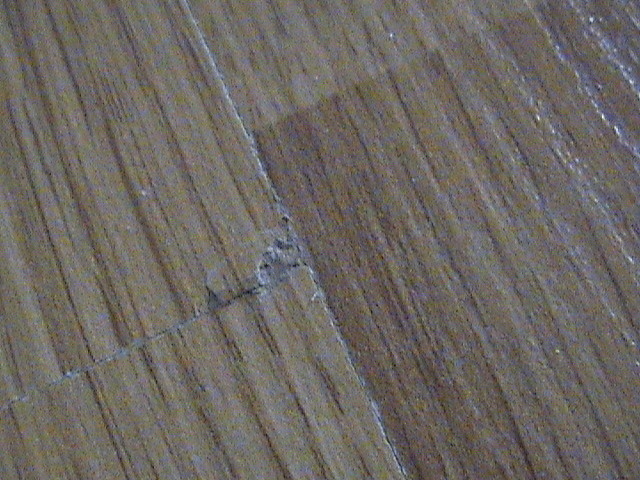
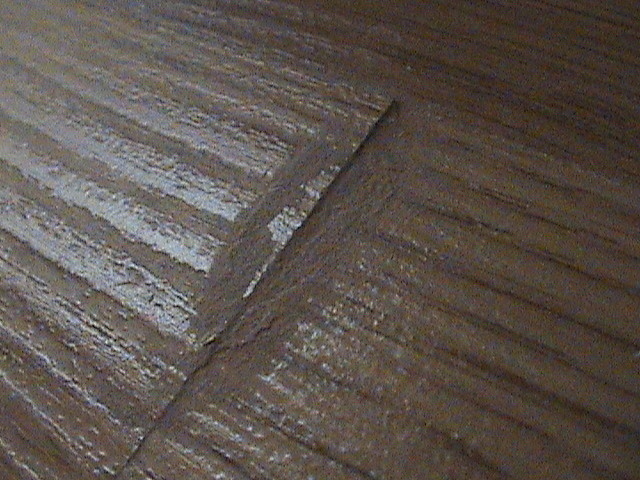
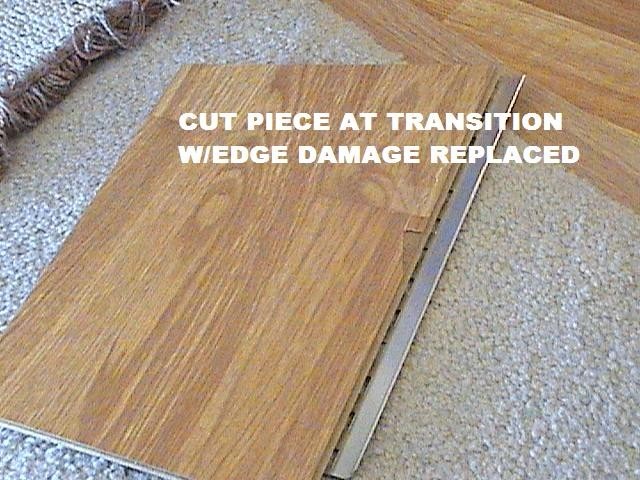
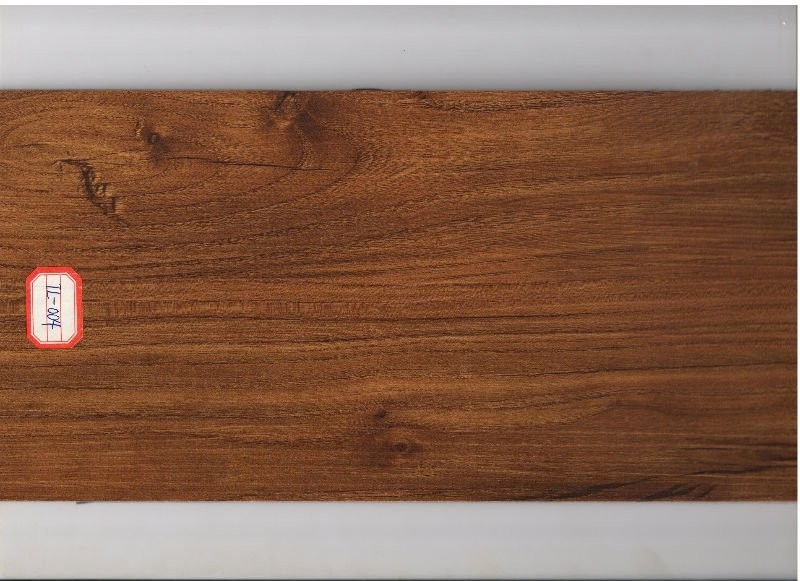
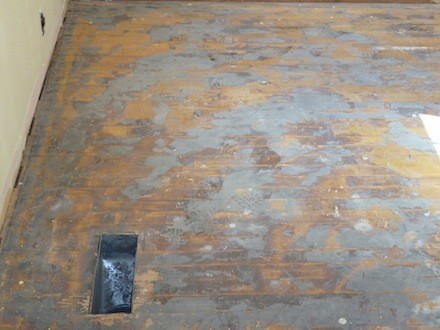
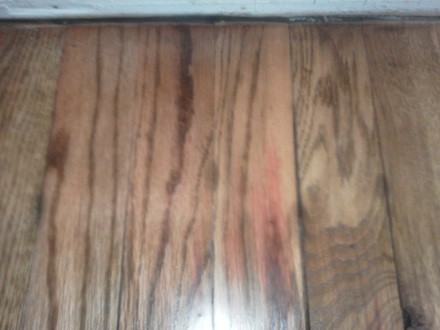
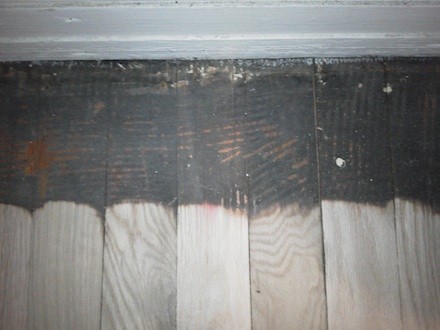
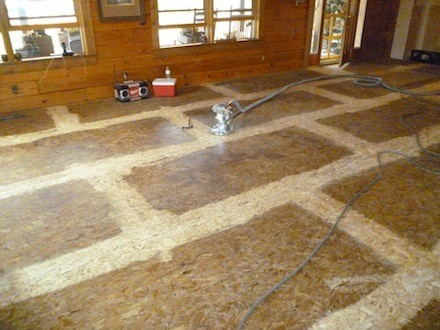
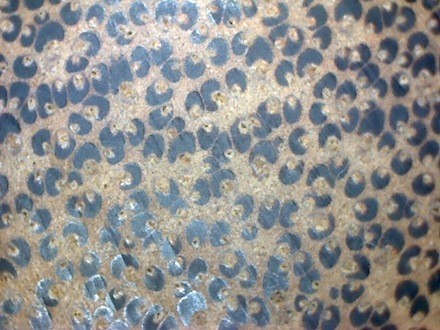
PHOTOS
IS THIS YOUR COMPLAINT?


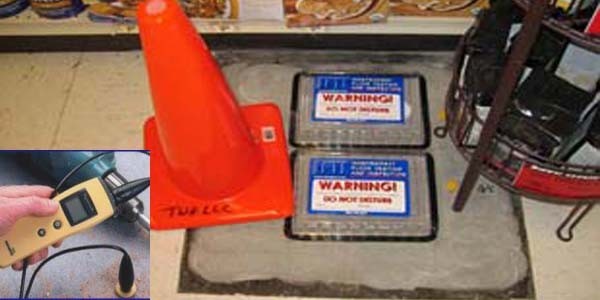


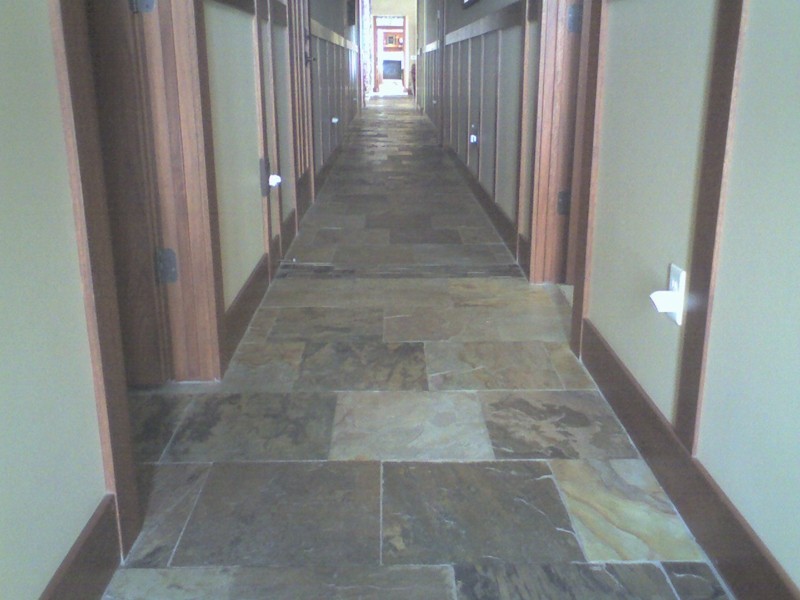


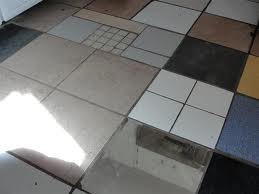


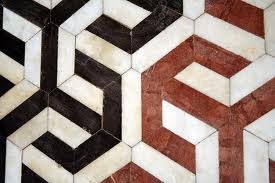
CERAMIC TILE
NOTE: ANY PART OF THE GENERAL INFORMATION FOUND BELOW CANNOT BE DEEMED ANY SOLE CAUSE OF A FLOORING FAILURE WITHOUT PROPER TESTING AND INSPECTION.
CONTENTS BELOW INCLUDE:
- CERAMIC TILE MANUFACTURING VIDEO
- INSTALLING LARGE FORMAT TILE VIDEO
- SETTING MATERIALS
- MOTARS AND GROUTS
- SLIPPERY WHEN WET
- POLYCONS
- GLASS FLOORS
- TROUBLESHOOTING - MOISTURE DAMAGE AND MOLD GROWTH
- HISTORY OF CERAMIC TILE IN USA
- ANTIMICROBIAL TILE
- FROST PROOF Vs. RESISTANT PORCELAIN TILES
- PORCELIAN TILE: MAINTENANCE & PROTECTION
- CERAMIC TILE
- CATALINA TILE
ANY QUESTIONS EMAIL: floorcoverig@cox.net
1. CERAMIC TILE MANUFACTURING - VIDEO
2. INSTALLING LARGE FORMAT TILE - VIDEO
3. SETTING MATERIALS
SETTING MATERIALS
Different types of setting materials for different applications.
*Dryset mortars (Which are also thin sets)
*Thinset polymer modified
*Medium beds
*Cementitious materials that avoid back buttering
*Wet setting into mortar beds (mud beds)
*Hydraullic or type 3 cement based mortars for quicker cures
*Mastics type 1 or 2
*Polyurethanes
*Epoxy based mortars
*Furan resin mortars
In general: Mastics are typically used for wall tile applications not exceeding 6 x 8, but some manufactures specify use on floors are larger format tiles (I personnally think its use should be limited to just walls and 6 x 6 tiles or less).
Polyurethanes (designed esp for tile installations, not just any urethane)have limited uses in that they can be used for setting moisture sensitive marbles (red, green and black), use where vibration is a problem, or setting over steel substrates after the steel is properly prepared. At one time polyurethanes use to be specified as a water proof membrane, but that is not the case today.
Epoxy based mortars also are good where you have moisture sensitive marbles, but are typically limited to interior usage, unlike latex modified thinsets, but it depends on the product because their are vast differences.
Quick setting hydraulic mortars offer the benefits on being able to grout sooner (in many cases 3-4 hours after setting instead of 24-48 hours traditionally required). But they also offer some other benefits such as being able to set marbles which can be affected by moisture such as white and light colors (but not in the same way that red, green and black marble is affected). Such mortars are generally available in either white or grey cement, thus you would use a white cement for a white marble.
Medium beds are used for larger format tiles such as the big 24 x 24, where you need a medium bed to afford better
coverage on the back of the tiles (minimum 80% is required, but installers should achieve 100% in situations where tiles will be exposed to the elements, esp freeze/thaw cycles).
Cementitious materials that avoid back buttering such as MAPEI's Adesilex P4, offers a lower viscosity product that allows installers of heavy and large format tiles to just drop it into the mortar and achieve an almost 100% coverage to the back of the tiles without back buttering (cool eh?)
Wet setting is practiced still but some installers, but has alot of disadvantages. Installers create a mortar bed of portland cement and sand and set tiles while the bed is still wet.
Furan mortars offer chemical resistance above and beyond other mortars, but is difficult to use and not widely available.
Dryset mortar is one that is mixed with water only are contains no polymers within its mix (that is what dryset really
means no polymers). A polymer modified thinset is a dryset with polymers added to it in dry state (thus it is called polymer modified thin set). Remember that drysets are considered thinsets as well. When you take a dryset and use a latex admixture with it, it too becomes a polymer modified thin set. You in most cases never want to take a polymer modified thin set and add a latex admixture to it as it will make it too soft and not cure properly. Tile installers sometimes will make their own dryset mortar with sand and cement or even make it polymer modified by using commercial products that carry water retention agents, latex and so on. A water retentive agent is important because if a patching compound or mortar comes in contact with a dry slab or CBU (cementitiuos backer board, i.e. Durrock), the mortar may de-water too quickly (leave the product to be absorbed into the substrate) thus the product fails to achieve a mechanical bond.
Mechanical bond is extremely important for acheiving optimum shear strength. In another thread this week A
mechanical bond is achieved between the cement matrix of the slab or CBU and the mortar. If we were to look at a cross
section of cement in a microscope at 1000x magnification, you would see that portland cement has what appears to be
little fingers. These fingers as I have coined them actually interlock with the "fingers" of the patch, mortar or what have
you that is cementitious based, thus you achieve mechanical bond between the two materials. What is not taught at many installation seminars is that in many cases you need what I call a "secondary back-up bond" to an already firm bond
achieved by the mechanical bond, this I call a flexural bond. You see, during the expansion/contraction of both tile and
substrate, extreme shear forces are applied. While a mechnical bond is extremely important if providing the resistance to the shearing away of the bond, the flexural bond is just as important in my estimation. The flexural bond is achieved via the latex admixture placed into drysets of patching compounds, and allows for some extra movement before the techanical bond finally gives away and shears. The tile industry considers the addition of a latex admixture, a way to make the product more flexible.
Urethane caulk use is Sika IA...it is about as hard as a hockey puck...but still very flexible, and eliminates the "trip
hazard" for women's high heels.
4. MOTARS & GROUTS
|
Mortars and Grouts |
MORTARS & GROUTS
At one time, floor tiles were installed and grouted with a single mortar. This mortar was mixed with Portland cement or its equivalent, was on the wet side, and served as setting bed, adhesive, and
grout. The mortar was floated and tiles were beat into the surface until some of the mortar oozed up into the joints. After the initial setup, the joints were struck, the tiles cleaned off, and the
mortar was damp cured. Sometimes, to increase the bond strength between the setting bed and tiles, a thin layer of dry Portland cement was spread over the wet setting bed before the tiles were
installed. This type of installation required a very highly skilled tile mechanic who was able to work both quickly and accurately. For best results, this type of installation required a rather
lengthy damp curing period that involved covering the floor with loose-laid plastic film or building paper and, depending on ambient temperature and humidity, misting the surface one, two, or three
times every day for about a week or longer.
Regular thinset mortars and unmodified grouts are modern advances and are relatively easy to use, but both still require damp curing to achieve maximum strength, and neither have any of the
benefits available with modified materials. Unmodified thinset mortars have good bond strength, but like regular, unmodified grouts, are rigid and inflexible. These qualities are fine for buildings
that are also rigid with limited flexibility, but these types of structures were far more common in the past and do not represent the type of construction now in use. Today’s residential and light
commercial structures are designed to be flexible, and the materials used in construction must be able to withstand a certain amount of flexing.
Currently, tile installations need to be done quickly, with minimal time and expense spent on damp curing, and with installation labor that may not always be highly trained. Technological advances in
mortars and grouts have resulted in materials that do not need long periods of damp curing nor seasoned professionals. These may cost a bit more than regular grout and adhesive mortars, but increased
material costs are more than offset by reductions in the cost of labor. From an installer’s point of view, less time spent on fussing with damp curing means more time can be spent installing
tiles.
Dry-set thinset mortar: The starting point for adhesive mortars is dry-set thinset mortar: a combination of sand, Portland cement and other additives that
help this mix retain water. Dry-set thinset mortar has a high compressive strength, and good bond strength for dry- and wet-areas and for tiles that will be submerged. Some manufacturers offer a
non-sanded version of dry-set thinset that is useful for installing small tiles (1-inch or less).
Modified thinset mortar: Modified thinset mortar refers to thinset mortar that has latex as an ingredient. The latex can be in liquid form and
added on-site (normally mixed with dry-set thinset powder). Modified thinset can also have the latex added, in dry form, at the factory: this is referred to as polymer-modified thinset and it is
mixed with water on-site. There are also some very high strength polymer-modified thinset mortars that require a companion liquid latex to be added, in place of water, on-site.
Epoxy thinset mortar: There are two types of epoxy thinset. One is a mixture of sand, Portland cement, epoxy resin, and epoxy hardener and it is called
epoxy-emulsion thinset. Another type, made from sand, epoxy resin, and epoxy hardener, is called 100% solids-epoxy and it can be used as both tile adhesive and grout.
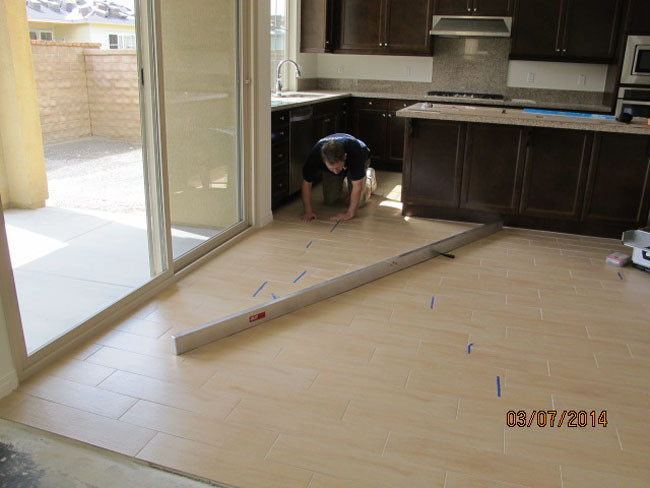
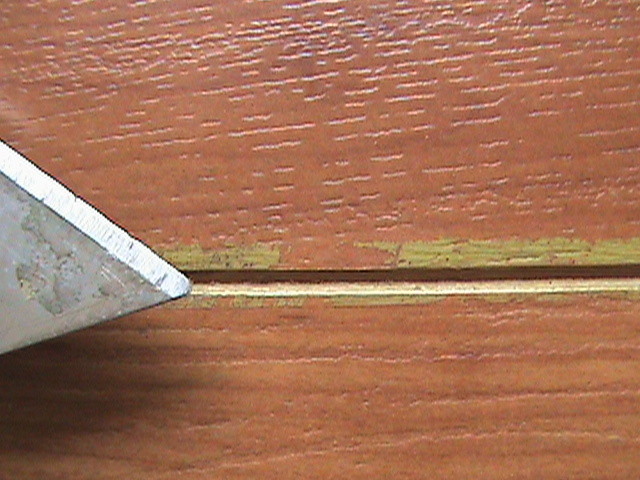
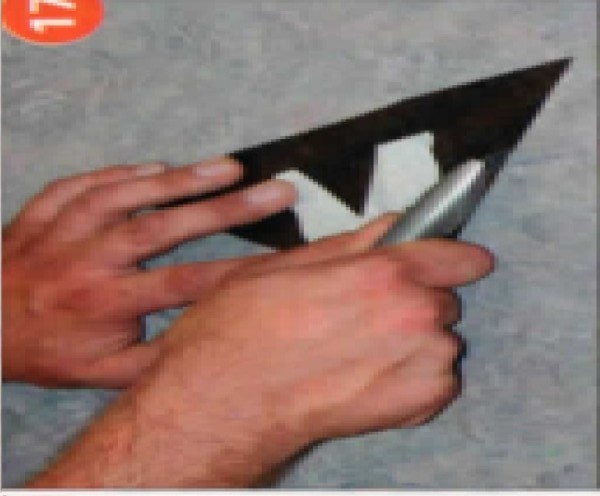
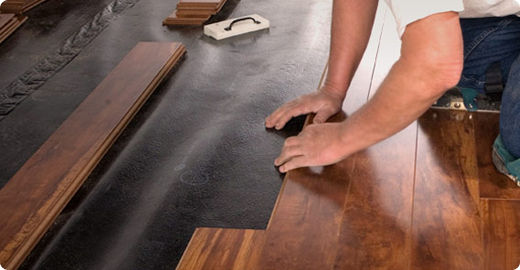
Applying thinset mortars: Thinset mortar is spread with a notched trowel. As tile sizes get larger and larger, the amount of thinset required
achieving the industry-recommended 80% dry-area and 95% wet or exterior area adhesive contact must also increase. Charts are available on packaging to aid in selecting the right size notch, but in my
experience, most charts underestimate the amount of thinset actually required. As well, tile industry practice says that in order to achieve good adhesion, the flat side of the trowel should be used
first, to key the material onto the setting bed surface, and the notched side is used next to comb out a uniform layer of thinset: good advice for any setting bed, but what about adhesion to the
tiles? In my opinion, in order to achieve maximum adhesion of the tile to the setting bed, all tiles should be back-buttered before they are set into the thinset spread on the setting bed. In fact,
when I am installing large-format tiles (10-inches or larger), rather than apply a skim coat to the back of each tile, I may use another notched trowel to ensure 95% uniform coverage (on my
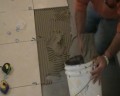
installations – dry or wet area – I strive for greater than 95% coverage). Photos 1 and 2 show the method I use to install large tiles. In photo
1, I use a portable table to make back-buttering easier. Back-buttering is not a slap-dash process but rather applying a uniform layer of adhesive. Photo
2 shows a method I use to ensure that the most vulnerable sections of a tile – the corners – are completely supported. After back-buttering, I apply a small amount of thinset to each
corner before installing the tile.
Achieving proper adhesive coverage when installing small tiles such as sheet-mounted mosaic tiles can be difficult, especially when slightly irregular tiles are selected. Normally,
back-buttering sheet-mounted tiles is not recommended because this method usually results in joints clogged with thinset that is very difficult to remove. Photos 3, 4, 5, and 6 illustrate a method I
use to back-butter small tiles without the usual thinset bleed-through. First, I spread a layer of thinset on the setting bed. Next, using a notched trowel, I spread a layer of thinset on a scrap
piece of plywood (Photo #3). After that, I use the smooth side of the trowel to gently flatten the adhesive ridges (Photo #4). Then, I set a sheet of tiles over the adhesive and press each tile into
the thinset (Photo #5). When this is done, I peel off the tile sheet (Photo #6) and install it on the setting bed. With the right trowel selection on both the setting bed and the tile sheet, maximum
adhesion is attained with little or no bleed-through. Note: the ridges on the setting bed must be knocked down smooth before each back-buttered mosaic sheet is installed.
Regular grout: Regular grout comes in two flavors: sanded and unsanded. Generally, unsanded grout is used for joints less than 1/8-inch wide,
while sanded is used to fill wider joints. Regular grout is composed primarily of sand and cement with a colorant and other trace ingredients that help retard setup. Regular grout is mixed with water
and it should be damp cured for three or four days after installation. Regular grout is inexpensive, but if used properly – with damp curing – labor costs can be significantly higher than if a
modified grout is used.
Modified grout: Regular grout can be modified by mixing with latex instead of water. Grout modified by the manufacturer with dry polymer latex is site
mixed with water. Dry polymer modified grout has several advantages over a regular grout/liquid additive. The most obvious are less weight to carry and more room in the truck. A not so obvious
advantage for a general contractor working with a sub installer is that with dry polymer mixes, it is hard to cheat by diluting the liquid latex with too much water. The benefits of modified grout
include more flexural strength, better color retention, and of importance to the installer, limited damp curing requirements. Some modified grouts require no damp curing while others may require one
or two light mistings. In hot weather, it is a good idea to mist all types of modified grout to improve hydration.
5. SIPPERY WHEN WET !!!
Moisture is an integral part of our atmosphere that is often a welcome friend, but it also can show up suddenly, uninvited, like an out-of-work uncle. Moisture is particularly troublesome when it seeps into buildings and residential structures. Varying in degrees from slight wall dampness to window condensation, to puddling water, it can wreak havoc with lumber, sheetrock, concrete, tile, carpet and many other vital materials found inside a home or commercial building.
Tracking the Culprits
The sources for moisture would fill out a convincing police lineup. One of the most obvious is rainwater, which can seep
into the house through the foundation and come up through the slab. It can also enter from the roof or through wall cracks. High humidity can be another factor that, in some regions of the
country, is unavoidable. But among the most overlooked culprits are people and their daily in-house routines. Bathrooms, laundry rooms and kitchens provide some of the primary spaces where many of
these moisture-generating activities occur. When you think of the constant moisture damage from a leaky toilet, a faulty supply line or a shower door that doesn't close properly, you might as well
view that drip, drip, drip as dollars going down the drain, because the expense of repairs can be long term, especially if you eventually have to replace the subfloor. The ounce of prevention that is
provided by a good waterproofing product can eliminate the high costs of a cure. Not only can moisture accumulate around areas such as sinks, showers and toilets, but it can also appear near
washers, dryers and refrigerators. But remember, it's not just the small child splashing in the tub or the broken hose on the back of the washing machine that require vigilance. It's the entire home,
because anywhere there are pipes, wall seams, shingles, slabs or windows, a potential problem can soak your pocketbook as a homeowner or dampen your good reputation as a construction
professional. And when you consider that long-standing moisture can lead to insidious mold problems, a potential health risk, you could face the possibility of litigation from those harmed by
its ill effects. No
builder, remodeler or flooring installer wants that very expensive headache.
Creating a Balanced Defense
So where do we draw the line of defense, especially since we know that water and moisture are so unrelenting? The prima-
ry concern should be around bathrooms and kitchens, plus entry points such as windows, doors and deck areas located
adjacent to or over occupied spaces. Your plan for protection should be a balanced system, so don't forget those all-impor-tant floors, foundation and slab. As a provider of waterproofing and crack
iso-lation membranes, flooring and under-layment products for the tile and stone industry, we at Mer-Krete Systems have seen firsthand the value of good moisture
prevention in those areas. It is important to consider the perme-ability of the construction materials used throughout the structure. Gypsum board and concrete, for example, can have high
permeability ratings, making them natural absorption areas for moisture. On the oth-er hand, low permeability materials such as latex paint, glass, polyethylene plastic and metal act as strong vapor
barriers.
There are many good moisture pre-ventive options out there, but some are better than others for particular situ-ations or applications. Products such as mold-inhibiting crack isolation and
waterproofing membranes can provide excellent moisture blocking characteristics. Our research and experience led us to develop a crack isolation membrane that not only isolates sub-floor cracking
under tile or stone, but also works effec-tively as a moisture barrier under vinyl, hardwood and carpet on a slab founda-tion. We found it equally important to provide over 800 percent elongation and
to ensure performance that exceeds ANSI A-118.10. By including a proven anti-mi-crobial additive that inhibits mold and mildew, we have been able to establish several different layers of
protection. One manufacturer has been touting a clear penetrating sealer that works as a breathable moisture barrier for mason-ry block, pre-cast and poured concrete foundation walls. Meeting
the environ-mental requirements of the damp-proof-ing industry, it can be applied, in one step, to dry or damp walls. According to
the manufacturer, there are no grade-line problems as associated with tar; it is odor-less and unaffected by ultraviolet rays.
When in Doubt, Waterproof It
In instances where the moisture is more prevalent and a vapor barrier is insufficient, an airtight waterproofing system may be needed. Waterproofing compounds can have a variety of properties. They may be urethanes, modified asphalts, clay based or rubber-based products. Good waterproofing systems, however, have one thing in common ground water has little or no long-term impact on them. They usually maintain good elasticity and can even bridge small foundation cracks.
Mer-Krete has developed several highly effective waterproofing solutions for the tile and stone industry. One of our load bearing waterproof membranes, applied in a cold,
semi-fluid state, includes an as phalt modified latex material reinforced with a synthetic fabric. Another, composed of a modified elastomeric copolymer, provides a 100 percent
waterproof coating in a single liquid application. Not only are these highly effective load-bearing membranes waterproof, but they will also limit the transfer of
substrate cracks to the-finished overlay. They can be applied to practically any form or irregular shape, including base flashing, parapets and walls.
For below-grade exterior foundation other hand, can bridge small foundation cracks, retain their elasticity and provide
self-sealing properties that are unaffected by long-term exposure to water. While we ourselves may need water for
sustenance, the structures where we live, conduct business and store our valuable items do much better in a dry condition,
free from the caprices of moisture. Water will always be around us, and that is a good thing. But with improving technology, it can be controlled in ways that keep it from becoming problematical. By
recognizing where those trouble spots may be and taking precautionary steps, before moisture infiltration occurs, you can confine the water to the backyard pool where it belongs.
6. POLYCONS
Polygons
Ok let’s say we are contracted to set marble tile around a circular fountain with atoothpick joint and the fountain is 3 foot wide with a 8 inch border around it and theoutside perimeter of the tile is to be done is a polygon shape (ex. multisided such as apentagon) sort like this with a three foot circle in the middle.
Now guessing at this could be quite expensive since due to the fountain being in theway we really cannot dry fit it. So we need to figure out the angles.
First we need to find the circumference of the outside perimeter so we can determinehow many tiles are needed. To figure circumference without trying to twist and bend a rigid medal tape measure into a circle do this by calculating the Diameter. In this case we will make the total diameter at 3 ft.(the fountain) plus 8" and8"(the border) that comes to 52" in all.
Ok now that we have the diameter we can calculate the circumference by using thisformula.
C=Pi x D
C=circumference and D=diameter and Pi=3.14or 3.14 x 52" =163.28"
Now we divide the 163.28 into the size of the tile and the grout joint. in this case letssay the tile is 11 1/2 and 1/16 joint comes to 11 9/16 or 11.563 decimal equivalent (achieved by dividing 9 into 16 remember).
Now 163.28 divided by 11.563 comes to 14.12 pieces of tile needed...yea I know that won’t work so we need now to divide this out to an EVEN number. Let’s go instead at 15pieces of tile. Thus 163.28 divided by 15 comes to 10.88 inches each tile needs to be or roughly 107/8 each. Lets not forget to subtract the grout joint (1/16 or .0625) then we get10.817 or approximate 10 13/32 each tile will need to be cut.
Now we know we will need 15 pieces of tile or a tetra decagon (yea, I had to look that one up) to make the border. But how do we know what angle to make the cuts?
Let’s remember that a circle is a full 360 degree angle so let’s just divide 360 by our 15pieces of tile. This comes to 24. Now with this number we can figure out our trianglepieces of tile. This is because this number 24 is the angle for the acute (sharp) angle ineach piece of tile (ex. if it were a pizza this angle would be the pointed vertex in the middle of the pizza or rather the first bite everyone takes). Now remember since the tile is not big enough to reach the center of the circle we will not have this point towork with and will need the other two angles for our cutting.Now since the sum of every triangle MUST equal 180 degrees we can figure the other angles.
Since the other two angles will be exactly the same all we need to do is subtract 24from 180 and get 156 and then divide this number in half and get 78 or 78 degree angles for our sides of the tiles. So our tile will have 24+78+78 =180 that’s our triangle.
Now at this point all we have next is to cut the inside circle (the perimeter of the fountain). I would do this by dry fitting the tile away from the fountain and marking thecenter with a nail then use a 18 inch string(or rather 18 1/4 for our expansion joint)then just pencil it out.
7. GLASS FLOOR
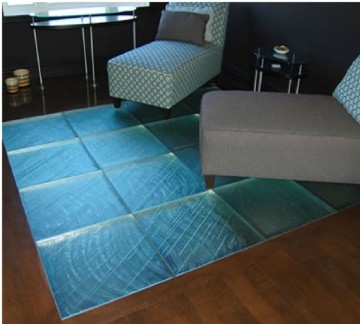
Glass Floor
Decorating our home with brand new furnishings is a great option for all of us. Most of the individuals prefer purchasing glass floor fountain. It is a great floor fountain that makes your home look better. You need to be very specific while choosing the right options for your home. Floor fountain really makes some pleasant sound. You can definitely heighten the appearance of your home using this option. However, you need to plan your budget well before proceeding further in this regard.
Glass floor fountain is a great option for you to pursue. You can definitely save some money decorate your home. Always be sure of what you need to buy. Now, let us discuss some of the key things regarding glass floor fountain.
• They are easy to set up and install.
• They require a fixed amount of water supply.
• Electrical supply required is less.
• Available in unlike styles, designs and colors.
So, these are some of the key benefits of glass floor fountains. However, you need to understand one thing that you must take extreme care of glass wall as it can break any time. You need to keep your mischievous kids away from this fountain. Well, I mustiness tell you that if you bring home glass floor fountains then you can easily evade stress away from your home. They offer a great scenic view for the guests visiting your home. You can host a company and impress your friends by showing off this great item.
It is just like a water wall that brings peacefulness in your home. You need to get in touch with a trained professional in order to generate some quick results. Otherwise you might end up on the losing side. They are smooth and soft to touch. The price can be a bit of problem. For this purpose, you need to do
some bargaining and carry out some market research. Research is extremely important. You can surf the net and look for your prospective options. By surfriding on the net you can easily avail certain offers and discounts.
The sizes available are wide ranging. You need to buy one as per your requirements. If you are having a large room and ample amount of space then a large glass floor fountain would be good for you. Otherwise you need to opt for a small one. The beauty of such water features is simply amazing. You need to look for some alternatives in this regard. Mostly, they ar meant for indoor purposes. Sometimes, even doctors prefer keeping their patients in front of water features. You moldiness have seen them in a lot of commercial institutions such as: schools, colleges and hotels. They are quite democratic all over the world. Several big brands are manufacturing such items. You need to consult a panel of experts in this process. So, these ar a few key things to note regarding glass floor fountains. You need to bring them home as soon as possible. Have a lot of fun and enjoy your day!
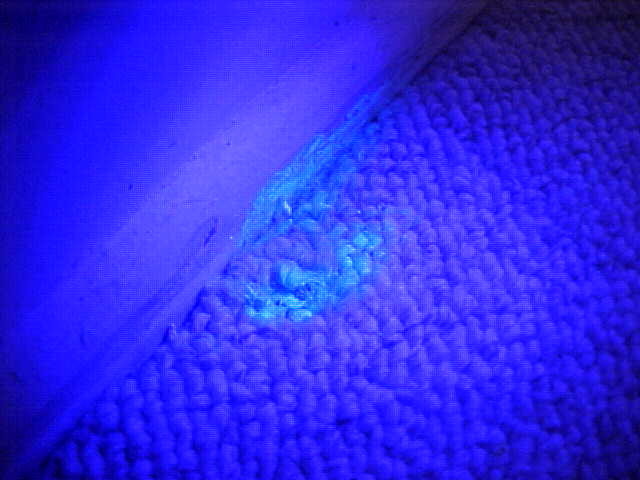
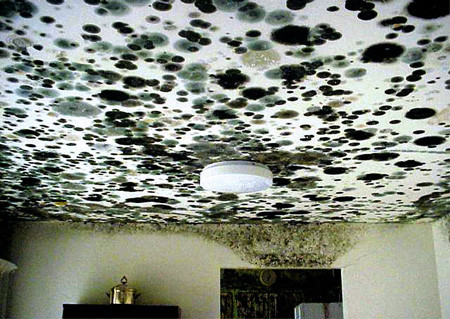
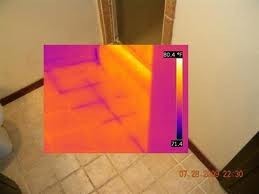
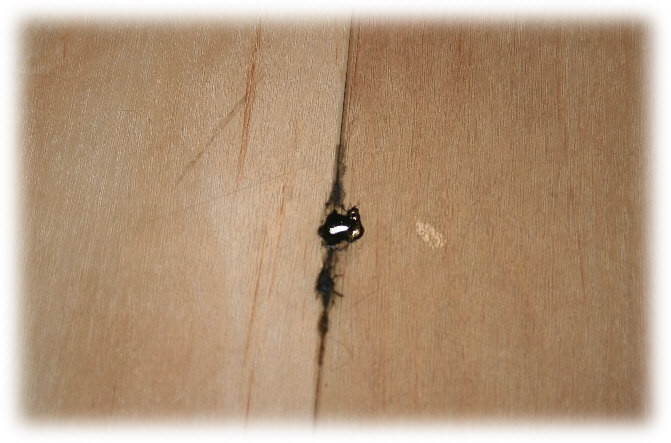
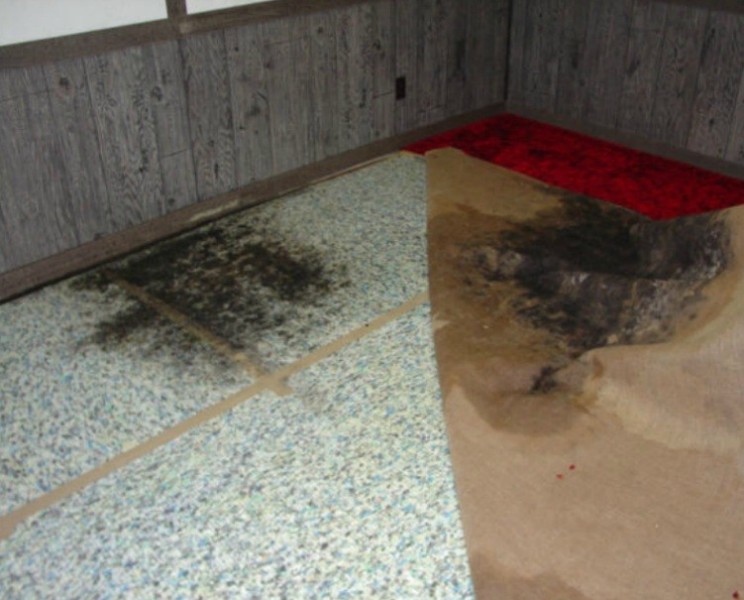
8. TROUBLESHOOTING - MOISTURE DAMAGE AND MOLD GROWTH
BASEMENT WATER POOFING MANUAL
Troubleshooting -Moisture Damage and Mold Growth
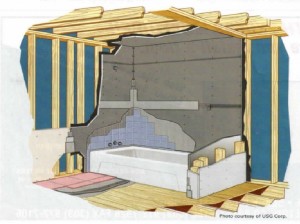
To keep pace with the demand for new housing and to conserve energy, today's homes are being built faster and tighter. This can translate into less time for building materials to properly dry out, as well as less air infiltration and circulation in the finished home. Add to these factors the different types of water and moisture leaks that can occur, plumbing leaks, roofing leaks, even leaks under and around windows and doors, and every home has the potential for moisture damage and mold growth. When the right conditions are present a food source, a source of moisture, and a temperature of 45 to 90 degrees F -mold spores can grow on any surface, including floors, walls, and ceilings. No home is completely mold-proof, and while homeowners can take precautions to help minimize the potential for such problems, the first and most effective line of defense begins with the building products that an installer or builder chooses. Depending on which interior products are installed and a homeowner's maintenance habits, a bathroom can be a particularly ideal environment for mold to thrive in. Shower walls are continuously exposed to water, water splashes out of tubs and showers onto the floor, and moisture (in the form of steam) finds its way throughout the room.
Unfortunately, mold growth is often undetected until it becomes a serious problem because it's often well hidden under wall and floor tiles. If you're installing floor tile on a bathroom subfloor other than concrete, chances are you're using a cement or gypsum backerboard. Before deciding on which backerboard is best suited for wet areas, it's recommended that you first:
1. Consult the 2006 Tile Council of North America Handbook. According to the TCNA, cement board and fiber-cement board are "recommended where water resistance is desired." Coated-glass mat water-resistant gypsum board, on the other hand, is "not for areas subject to continuous water immersion." Similarly, fiber-reinforced water-resistant gypsum backer board is recommended for use in "dry or limited water exposure areas." For more information or to view the TCA handbook, visit www.tileusa.com.
2. Determine if the backerboard you are considering achieves the best possible score on the ASTM (American Society for Testing and Materials) tests for mold growth - ASTM G21 and ASTM D3273. Following industr y guidelines and selecting a proper backerboard designed for wet area installations can have a major impact on reducing the potential for unnecessary moisture damage and mold growth in your remodeling projects and in today's new homes.
VIDEO..... WHAT NOT TO DO WHEN INSTALLING A TILES BATHROOM SHOWER
http://www.youtube.com/watch?feature=player_detailpage&v=b1HTytjQ3HQ
9. HISTORY OF CERAMIC TILE IN USA

The History of Ceramic Tile in the United States
Presented by Robert E. Daniels, Executive Director Emeritus of TCNA (Updated September 2005)
When I was asked to write a history of ceramic tile in the United States I took a long time thinking about how to approach the subject. Ceramic tile has a long history. Probably no one knows the actual beginning but tile has been around for a very long time. I remember how impressed I was with the tile still in good condition in the ruins of ancient Rome. The tile in Pompeii is still in excellent shape after 2000 years, although it was buried in volcanic ash for much of this time.
Recently a kiln was unearthed in Centamura del Chianti, near Siena, Italy from the 3rd century b.c.e. Broken pieces of ceramics were found in the ruins of the kiln. These were surmised to have been offered to the god of the kiln to bless the outcome of future firings. Making ceramics was a hazardous and speculative business in those days. But this article is about the more recent past where the outcome of the firings is much more predictable.
North American tile making had its roots in Europe where tile had been manufactured for years. Tile artisans brought this craft with them in the 1800's and set up tile making factories all over the country. Tile was largely made by "batch firing" the tile in some form of stationery kiln, such as a beehive shaped brick kiln. The tiles were placed into the kiln and heated or baked until some transformation of the mineral particles occurred. This would cause the body to solidify and, if glazed, for the glaze to melt and fuse to the body of the tile. The process could take 24 hours or more for this single firing.
In the pre-World War II era, much of the tile was made in this batch fashion. The tile body material was fed into a press usually by hand, then dried, glazed and baked in a batch kiln. Loading and unloading kilns was a major labor-consuming item. Finishing was laborious as well and could involve hand painting tiles, silk screening, inserting different colored glazes and other forms of decoration. If a multi-colored tile was to be produced multiple firings would be required. Thus the tile would have to be hand-loaded in and out of the kiln and heated for many cycles before it was completed. This could take many days for completion of a production run. The amount of labor was very high.
The firing temperature in these batch kilns could vary quite a lot from one area of the kiln to another resulting in size and color variations as well as a high scrap rate. Thus the yield of a given run could be quite low.
One major improvement from these early method was the development of the tunnel kiln, a long structure that had moving transport devices conveying tile through continuously. The tiles ready for firing were loaded onto carts with support devices called "kiln furniture" and the carts pushed through the kiln by some means including human-power. It took a strong back to push kiln carts through a 200-foot or longer kiln. Other innovations in the early 1900's included the use of conveyor belts to transport the tile from the press to the finishing department and into the kiln and mechanical presses to take the human muscle out of the process.
But the industry didn't stop there and is still innovating. In the 1960's early experimenting with a device called a "roller-hearth" kiln began. The device consisted of a series of ceramic rollers that were gear-driven and would transport a single layer of tiles through the firing zone of a kiln. This method had several advantages. Each tile was exposed to a very similar firing condition making the tiles more uniform. Also the firing time was reduced to less than 45 minutes and finally, the tiles could be automatically fed into and out of the kiln.
By the early 1980's roller-hearth kilns were being installed in the United States. This was a sea change for our industry. Other innovations from this period included hydraulic presses that could generate very high pressure allowing for larger-sized tiles, greater body uniformity, and more output per stroke of the press.
The output of the earliest production roller-hearth kilns was about 6-7 million square feet per year. Today there are large kilns that will make 30 million square feet per year with the same number of workers. The process that is used for most tile production today is known as the pressed-dust method. It involves grinding the mineral constituents of the tile body in water slurry. The tile body is made up of a mixture of various mineral components depending on the desired properties of the finished tile, such as feldspar, ball-clay, talc, shale, etc. ground to a various particle sizes.
This slurry, which contains about 50% water is then spray-dried to a damp powder and stored to season it. From storage the powder is fed to the large presses, some exerting up to 7 tons of pressure, where it is pressed into the shape of the tile body. The next step is to convey the tiles into a drier to reduce the water content to about 2% and then to the glazing line (some tiles are not glazed) where a plethora of devices may be used to create the desired look. Some devices include sprayers, silk-screening devices, dry-glaze dispersers, waterfalls, rollers, texture imprinters etc.
From the glaze line the tiles enter the kiln where they may be fired once (monocottura) or several times if required by a specific design, Then the tiles are transported directly to an inspection area where a visual and/or electronic inspection of every tile occurs. The latest technology provides for complete computer testing for size, shape, flatness, and finish. Tiles are automatically sorted to a tolerance of ½ millimeter size and placed into appropriate caliber stacks and then put into marked cartons. Most of these steps take place with no human intervention in the latest technology driven factory.
At the end of the line, a robot places the cartons of tile on a pallet for movement into the warehouse. This is not to say that there are no workers in the plant. With all this high tech equipment the factory needs a highly trained and capable maintenance department. Unfortunately most plants have to contend with kiln fires, broken rollers, and other mishaps. Since the process is continuous for 24 hours a day 7 days a week, the crews must be ready at all times. Changeovers are required for the various colors, sizes of tiles, and textures. Ceramic engineers and technicians must be on hand to develop formulations and techniques for the different designs. The production managers would love to run all off-white 12X12 inch tiles all the time but today's educated consumer wants variety.
Interestingly enough, despite all this technology there are still tile producers making hand-painted and formed tile that is batch-fired in the old way (except they are using small electric kilns instead of the old brick beehives). The Tile Council of North America has about 50 art tile makers using some of the techniques of yesteryear mentioned above.
What does this mean for the consumer? For one thing the reduction in labor has made ceramic tile very affordable. The price has never been lower in the current period. Tile is available in many sizes, designs, styles, textures, and colors thus freeing the designer to create a given look. Modern techniques permit the manufacturer to make tile that emulates natural products such as marble, limestone, granite, slate, etc. Tile that matches older styles is available for the period look. The properties of tile such as strength, shape, size tolerance, slip-resistance, color, shading, are much more uniform and predictable. New equipment can make individual tile that are 2X4 feet or larger.
In short we've come a long way since the days of the ancients and we are still going forward.
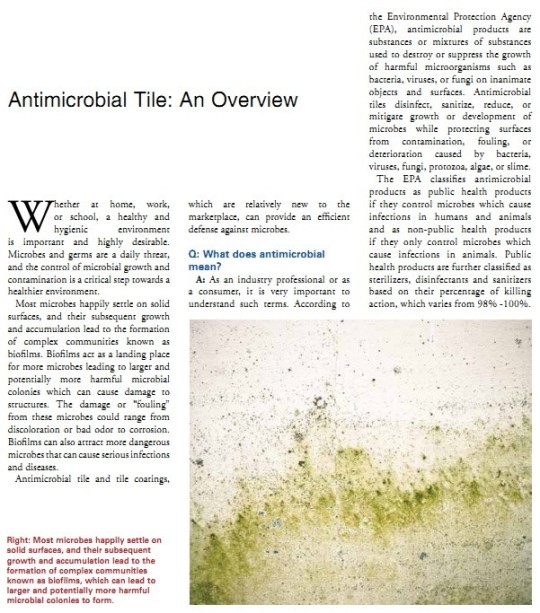
10. ANTIMICROBIAL TILE
11. FROST PROOF Vs. RESISTANT PORCELAIN TILES
Frost Proof Vs. Frost Resistant Porcelain Tiles
By Tyler Lacoma
Frost is an important consideration when choosing what tile to use outdoors. Homeowners may be tempted to use simple and varied ceramic tiles, like they use indoors. However, almost all ceramic tiles will suffer in any but the most mild climates, and quickly deteriorate under frosty, winter conditions. Porcelain tiles offer more protection, which is where the terms "frost resistant" and "frost proof" become important.
Porcelain Tile
Both ceramic and porcelain tiles are made out of clay, but the way they are made differs. Where ceramic is made by molding clay normally and firing it in a kiln, porcelain is made by compressing clay forcing down into a dense substrate. This denser construction makes porcelain heavier and more durable--and less absorbent, giving it greater frost resistance.
Water Absorbency
As long as water stays on the top of the tile and does not soak through the glaze, it does relatively little harm to the tile. However, when water soaks through the tile, it stays there until colder weather comes and freezes it. The water then cracks the tile when it expands, and when it melts, it takes crumbling pieces of the tile with it. The less water the tile absorbs, the less damage the water does when it freezes.
Resistant vs. Proof
Frost resistant tiles have a water absorbency greater than 3 percent, but less than 0.5 percent, which means that only 3 percent or less of the water falling on the tile will be absorbed into it. Anything greater than 3 percent, and the tile will become easily damaged. Tile that absorbs 0.5 percent or less water is referred to as frostproof, because it offers the highest defense available against frost.
Porcelain Qualities
Porcelain is a very tough tile, and it is unlikely that homeowners will find any porcelain tiles that are not frostproof, since their construction usually leads naturally to frostproof qualities. Sometimes frostproof and porcelain are even used interchangeably. Ceramic tiles are more likely to be only frostproof, although some types of porcelain tile may also fall in this category, especially if they are unglazed. There is usually no price difference directly connected with frost resistant qualities.
Literal Frostproof Tiles
No tile is literally frostproof. Even if only 0.5 percent of the water porcelain is exposed to is absorbed into it, it will still do some damage. Outdoor porcelain tiles will not last as long as indoor porcelain tiles in a cold climate, no matter what. But the less absorbent the tiles are, the better lifespan they will have. This is why porcelain tiles are ideal for landscaping, and recommended above ceramic versions.
12. PORCELIAN TILE: MAINTENANCE & PROTECTION
Porcelain Tile: Cleaning, Maintenance, Protection and Sealing
Most types of tiles that are made from clay or a mixture of clay and other materials and then kiln-fired, are considered to be a part of the larger classification called “Ceramic Tiles”. These tiles can be split into two groups, porcelain tiles and non-porcelain tiles. These non-porcelain tiles are frequently referred to as ceramic tiles by themselves, separate from porcelain tiles - confusing!
Non-porcelain ceramic tiles are generally made from red or white clay fired in a kiln. They are almost always finished with a durable glaze, which carries the color and pattern. These tiles are used in both wall and floor applications. Non-porcelain ceramic tiles are usually suitable for very light to moderate traffic and generally have a relatively high water absorption rating making them less frost resistant and they are more prone to wear and chipping than porcelain tiles. Porcelain tile is more scratch resistant than ceramic tile. Also, porcelain tile is fired at higher temperatures than ceramic, resulting in superior durability and stain resistance.
Porcelain unglazed tile is generally made by the dust pressed method from porcelain clays which result in a tile that is dense, impervious, fine grained and smooth, with a sharply formed face. Porcelain tiles usually have a much lower water absorption rate (less than 0.5%) than non-porcelain ceramic tiles making them frost resistant. Full body porcelain tiles carry the color and pattern through the entire thickness of the tile making them virtually impervious to wear and are suitable for any application from residential to the highest traffic commercial or industrial applications. Because porcelain tile is fire-hardened and quite hard, it can be cleaned at pressures up to 1,450 PSI if the grout is in good condition.
Porcelain unglazed tiles are similar to glazed tile, except that their surface is not coated. Full-body porcelain unglazed tiles do not show wear because their color extends throughout the tile, making them ideal for commercial applications.
PEI classes range from 0 to 5. The Porcelain Enamel Institute rating scale is not a measurement of quality. It is a scale that clearly indicates the areas of use each manufacturer recommends and has designed their tile to fit. A PEI 2 tile has been designed for areas where very low traffic and soiling is anticipated. In most cases the aesthetic detailing of these tiles is of prime consideration. You will often find high gloss levels, vibrant colorations and metallic elements in this group of tile. Conversely, a PEI 5 tile has been designed for abusive extra heavy foot traffic:
- PEI Class 0 - No Foot Traffic: Wall tile only and should not be used on floors
- PEI Class 1 - Very light traffic: Very low foot traffic, bare or stocking feet only. (Master bath, spa bathroom).
- PEI Class 2 - Light Traffic: Slipper or soft-soled shoes. Second level main bathroom areas, bedrooms.
- PEI Class 3 - Light to Moderate Traffic: Any residential area with the possible exception of some entries and kitchens if extremely heavy or abrasive traffic is anticipated.
- PEI Class 4 - Moderate to Heavy Traffic: High foot traffic, areas where abrasive or outside dirt could be tracked. Residential entry, kitchen, balcony, and countertop.
- PEI Class 5 - Heavy Traffic: Ceramic tile suggested for residential, commercial and institutional floor subjected to heavy traffic.
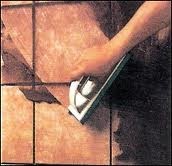
Sealing Ceramic and Porcelain Tile & Grout
Glazed tiles are coated with a liquid glass, which is then baked into the surface of the clay. The glaze provides an unlimited array of colors and designs as well as protects the tile from staining. A glazed tile is already stain proof, so there is no purpose to putting on a sealer. However, the grout joint between the tiles is usually very porous and generally made of a cement-based material. Therefore, grout joints typically will need to be sealed and maintained properly to prevent stains and discoloration. Impregnating sealers such as All-Purpose Grout Sealer go into the grout joint and protect against water and oil-based stains. Most industry professionals recognize that grout is best protected with a fluorochemical-based sealer, such as Impregnator Pro or All-Purpose Grout Sealer. If the grout joint is epoxy, a sealer is not necessary.
Unglazed porcelain tile should be protected with a penetrating sealer, such as Sta-Clene, Bullet Proof or Impregnator Pro, including the grout lines. The penetrating sealer is an invisible, stain resistant shield that is absorbed into the surface.
Cementitious grout must be sealed to prevent or minimize staining. Leaving these surfaces unsealed may greatly hinder the ability to completely
remove stains in the future. Allow new installations to cure for 72 hours prior to applying sealer.
For a natural looking protector on interior and exterior surfaces (heavy duty protection, water and oil repellency):
- Sweep or vacuum all dust, dirt and debris.
- Mask off and protect any baseboards or adjacent areas to avoid splashing and overspray onto surfaces not intended to be treated.
- Ensure that the surface is clean, dry and residue-free.
- Liberally apply StoneTech Professional™ Grout Sealer using a low-pressure chemical-resistant sprayer, narrow roller or natural hairbrush, focusing on the grout joints.
- Allow sealer to completely penetrate into the grout, 5-15 minutes.
- Liberally apply a second coat of Grout Sealer following steps 4-5.
- Wipe up all sealer from the surface of the tile. Use a clean, dry, lint-free, cotton towel or mop to remove excess sealer. Or, go over the floor with a cotton bonnet on a low-speed buffer.
- If sealer was not completely wiped off and a residue appears, wipe entire surface with a towel dampened with sealer. Use a white, non-abrasive nylon brush or pad to loosen residue and follow with a clean, white absorbent towel to remove.
- A full cure is achieved after 24-48 hours; foot traffic may begin in 4 hours. Cover with red rosin paper, if foot traffic must resume before the recommended time periods have passed.
- Expected coverage is 600-1,000 sq. ft. per gallon based upon grout joint width.
- A 3-5 year re-application is needed for interior surfaces.
- A 1-3 year re-application is needed for exterior surfaces.
Cleaning Ceramic and Porcelain Tile & Grout
- Keeping ceramic, porcelain tile & grout free of dust and dry, sandy soil will minimize scratches, wear patterns and grout soiling that can develop from everyday use and traffic.
- Use walk-off mats to trap abrasive soil before it gets into the house or building.
- Sweep, dust or vacuum surfaces regularly to remove loose soil and dust.
- Clean the tile & grout using warm water and a clean nonabrasive cloth sponge or mop.
- Use a neutral cleaner such as Stone & Tile Cleaner or Revitalizer that is specially formulated for ceramic, porcelain tile & grout to help remove soils that sweeping, dusting, vacuuming or damp mopping leave behind.
- For extremely soiled tile, clean with KlenzAll heavy duty alkaline cleaner and degreaser.
- Do not use ordinary household cleaners, as you may degrade the sealer that was applied to the grout to protect against stains.
Countertops and Vanities
Use a ph-balanced cleaner such as Stone & Tile Cleaner or Revitalizer to keep surfaces clean from everyday soils and stains.
Floor Surfaces
Vacuum or dust frequently using a clean non-treated dry dust mop. Sand, dirt and grit may scratch your tile or build-up on your grout joint leading to discoloration. Mats or area rugs inside and outside an entrance will help minimize the potential damage from these particles.
Damp mop your tile floor with a diluted solution of neutral cleaner such as Stone & Tile Cleaner or Revitalizer. Try to stay off the floor until it is completely dry, as wet tile floors may be slippery.
Bath and Other Wet Areas
For daily maintenance cleaning, use a neutral, ph-balanced cleaner such as Stone & Tile Cleaner or Revitalizer to clean everyday soils and stains. In the bath, or other wet areas, using a squeegee after each use can help minimize this build-up.
Restoring Ceramic and Porcelain Tile & Grout
For cleaning and restoring old ceramic, porcelain tile and grout to like new condition, we recommend using an acidic cleaner such as Restore designed for this surface. This will remove tough soap scum, hard water deposits, grout haze and efflorescence. If you have heavy grease and oil stains, pre-clean using an alkaline cleaner formulated for ceramic and porcelain tile, such as KlenzAll heavy duty alkaline cleaner and degreaser. This will cut through tough grease and soil stains.
After restoring your tile and grout, remember to seal with an impregnating sealer such as Bullet Proof or Impregnator Pro, including the grout lines.to guard against future stains.
Grout Etching
Ceramic and porcelain tile is usually impervious or highly resistant to staining. However, grout may be a different story. Substances that are highly acidic, such as orange juice, coffee, vinegar, wine, tomato-based products, mustard and many soft drinks will most likely leave an “etch,” a chemical reaction that may leave a dull area or mark. Properly sealing the grout will give you time to wipe up a spill to avoid staining, but it cannot prevent etching. In addition, ordinary household cleaners with colored dyes or those containing bleach, ammonia or abrasives are not recommended for ceramic, porcelain tile & grout. They may damage the surface and likely degrade the sealer that is applied to the grout, which provides stain protection.
Food Spills
Scoop up food with a plastic spoon. Blot with a dry white cloth. Spray the area with a neutral cleaner such as Stone & Tile Cleaner or Revitalizer and wipe off excess with a clean cloth.
Liquid Spills
Blot up the excess with a clean, dry cloth. Then clean the area with Stone & Tile Cleaner or Revitalizer and wipe off excess with a clean cloth.
Mud
Let the mud stain dry completely. Remove dried mud with a soft plastic nylon brush. Then clean the area with Stone & Tile Cleaner or Revitalizer and wipe off excess with a clean cloth.
Restorative Cleaning of Ceramic and Porcelain Tile & Grout
Depending on the type of soil, stain or other foreign matter present, select one or more of the following options:
- For stripping off any existing topical acrylic, urethane, epoxy, heavy wax
coatings and epoxy grout haze:
- Mask off and protect any baseboards or adjacent areas to avoid splashing and overspray onto surfaces not intended to be treated.
- Sweep or dust mop loose dirt and debris.
- For heavy, hard to remove coatings, use StoneTech Professional™ Heavy Duty Coating Stripper as is.
- For softer coatings, dilute Heavy Duty Coating Stripper with clean water up to a 1 to 1 solution.
- Apply an even coat using a chemical-resistant paintbrush, roller or deck brush.
- Allow stripper to dwell for 20 minutes to 2 hours or as long as needed to soften coating.
- Heavy Duty Coating Stripper will remain active for up to 24 hours
- Do not allow Heavy Duty Coating Stripper to remain in contact with epoxy grout joints for longer than two hours.
- Agitate well using a stiff nylon bristle scrub brush, stiff bristle push broom or a weighted floor machine at 130-140 lbs., 175 rpm, fitted with a scrub brush attachment.
- Rinse well with clean water and mop, sponge or wet vacuum to remove the remaining cleaning solution.
- A hard surface extraction wand and portable or truck mounted extraction machine may be used.
- Repeat the rinsing and wet vacuum process to insure that all dirt, soil and cleaner residues have been removed.
- For cleaning of grease, oil, dirt, dry soil and soap scum:
- Mask off and protect any baseboards or adjacent areas to avoid splashing and overspray onto surfaces not intended to be treated.
- Sweep or dust mop loose dirt and debris.
- Strip off all topical finishes such as waxes and coatings.
- Prepare a solution of StoneTech Professional™KlenzAll™ mixed with warm or hot water as suggested below:
- (a) Medium Duty Usage — Mix 1 part KlenzAll™ to 4 parts of water.
- (b) Heavy Duty Usage — Mix 1 part KlenzAll™ to 2 parts of water.
- Apply KlenzAll™ using a low-pressure chemical-resistant sprayer, sponge or mop.
- Agitate well using a stiff nylon bristle scrub brush, stiff bristle push broom or a weighted floor machine at 130 lbs.-140 lbs., 175 rpm, fitted with a scrub brush attachment.
- Rinse well with clean water and mop, sponge or wet vacuum to remove the remaining cleaning solution.
- A hard surface extraction wand and portable or truck mounted extraction machine may be used.
- Repeat the rinsing and wet vacuum process to insure that all dirt, soil and cleaner residue have been removed.
- To remove deep or stubborn oil stains not completely removed by KlenzAll™, let the surface dry and use StoneTech Professional™
Oil Stain Remover.
- Apply a ¼ inch thick coat of Oil Stain Remover to the oil stained area.
- Ensure that Oil Stain Remover covers an area 1” to 2” beyond the stained area for the purpose of containment.
- Allow 2-3 days for the Oil Stain Remover to dry to a powder.
- Sweep and wipe up dried powder and evaluate the stained area for removal.
- Repeat process if needed.
- Remove any remaining Oil Stain Remover using mineral spirits.
What are the DON'Ts of Porcelain Tile?
- DON'T use top sealers such as floor finishes - those that become a coating over the tile and grout joints, are not recommended for porcelain tile. They will change the appearance of the tile by coating the surface and giving matte-finished tiles a shiny finish. When a particular type of tile is selected for the coefficient of friction values, the values can be changed by the application of the sealer. Rather than improving the ability to maintain the surface, top sealers will increase the maintenance requirement. Top-coating sealers will also show traffic patterns as the sealer becomes scratched or wears away. Some sealers may even peel off in spots.
Problems most frequently encountered with the use of top-coating sealers on porcelain are:
- Wear patterns are easily developed over time.
- If the sealer has been applied to a floor which has not been properly cleaned, it will cause the floor to look hazy.
- If the sealer is improperly applied, it can turn to a milky-white color.
- Multiple coats of the top sealer can cause discoloration of the tile surface.
- When problems such as these occur, the sealer must be stripped from the tile and a new coat of sealer re- applied. This is a costly and unnecessarily repetitive procedure.
Products for Ceramic and Porcelain Tile & Grout Maintenance and Protection:
- All-Purpose Grout Sealer
- Bullet Proof impregnating water-based sealer
- Impregnator Pro impregnating solvent-based sealer
- KlenzAll heavy duty alkaline cleaner and degreaser
- Oil and Stain Remover
- Revitalizer™ cleaner & protector
- Stone Care Guide tri-fold Brochure
- Stone Sealer impregnating water-based sealer.
13. CERAMIC TILE
Ceramic tile is basically made of clay baked in a kiln and hardened through high or extremely high temperatures. Some terracotta tiles are an exception: they are simply cured.
Materials and types of tile
Ceramic tile comprises several types of materials: porcelain, terracotta, pavers, quarry, and common glazed and unglazed ceramic. Non-ceramic tile comprises cement-based tiles and stone tiles.
Technologies
Traditional ceramic tile technologies make extensive use of double-firing to bake and to glaze the tile. A more modern technology - technically known as monocottura – uses a single firing process, which can be more economical and produce an equally dense and durable tile, with an extremely hard glaze.
Ceramic tile: Glazed and Unglazed
Tiles can be glazed or unglazed. Glazed tiles incorporate a liquid glass (baked onto the clay’s surface). Glazing protects the tile from staining, and allows a large array of colors and designs to be added to the tiles.
Durability and hardness of ceramic tile
Glazed ceramic tile differs a lot in terms of appearance, durability, water absorption and hardness - features that should be taken into account.
There are very aesthetical though fragile or relatively fragile tile (terracotta, for instance), and extremely durable and water-resistant tile, but hard and cold, and more expensive (that’s namely the case of porcelain tile).
Durability, hardness or non-absorption depends on clay composition and especially on the firing process and on glazing (or its nonexistence).
Glazed tile Pros
Glazed tile is more resistant to stains, and offers a wider range of colors and designs… Light-colored glazing is typically stronger than dark-colored one.
Unglazed tile Pros
Unglazed tiles are more natural looking and many of them have a higher wear-resistance (since the interior body of the tile doesn't differ from its surface); unglazed tile is more slip-resistant, due to its natural surface.
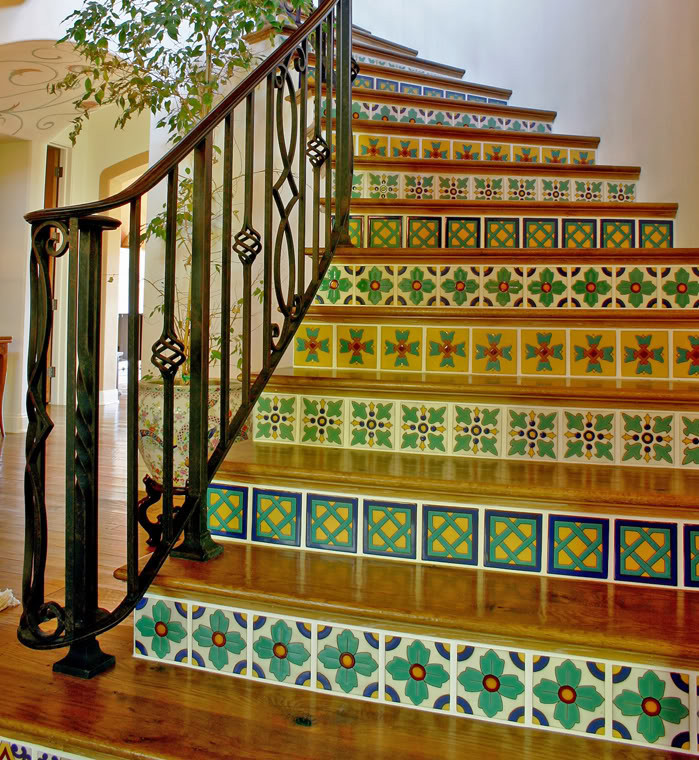
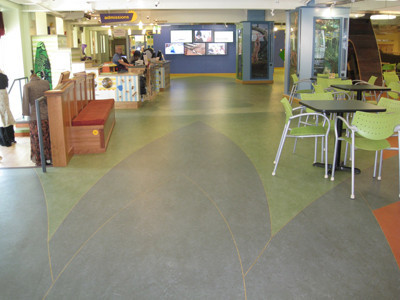
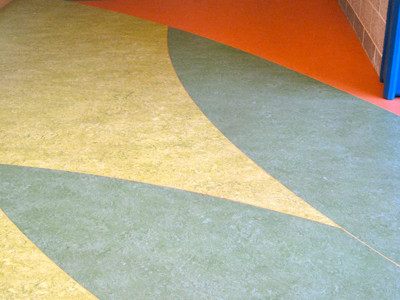
Ceramic Tile Designs
Ceramic tile offers a wide set of colors, designs, dimensions and shapes - square, round, octagonal, freeform... –, allowing multiple combinations and endless possibilities and effects.
All depends on your imagination and tastes. You may prefer sober one-color installations, or you may want to combine multiple colors or use decorative borders and insets with chosen tiles and colors.
You may use different colors and patterns to divide room areas and to create focal points, according to your preferences and needs.
Where to Use Ceramic tile?
In colder climates, ceramic tile is mainly used in entryways, corridors, bathrooms, kitchens and basements. In temperate and mostly in hot climates it may also be used, with advantage, in living and family rooms, or in bedrooms (cold and hard floor underfoot isn’t such a disadvantage in these climates)
Prefer vitreous and impervious tiles (that is, non-absorbent tiles) in basements flooring, or in bathrooms and other areas of the house where moisture and water absorption may be significant. Many outdoor applications also demand tiles with low moisture absorption (often less than 0.5%). Glazed tile and porcelain tile have that feature.
Durability & Life Expectancy
Ceramic tile may last the lifetime of your home, as long as you install the right type of tile (in terms of hardness, porosity...).
Typical Warranties
Some manufacturers offer warranties against fading, stains, etc. Warranties ranging from 10 to 20 years or even more are possible, but ceramic lifespan can easily outlast these warranty periods and most manufacturers (even the best) do not offer any warranty.
Care & Maintenance
Ceramic tile demands a very low maintenance: just sweep when needed, and use a mop and an appropriate cleaner to wash and dry occasionally. Only softer or porous tile demands extra cares or sealing.
Tile Price
Tile flooring is competitive, but its prices vary with its sub-types. Porcelain tile is more expensive than others types of tile. Some tile bricks and pavers are very cheap products.
Installation costs
Installation costs are often as expensive as the tile itself: costs in the $2-$6 per sq/foot range are common, but they vary a lot. All depends on local labor rates and subfloor conditions and needs.
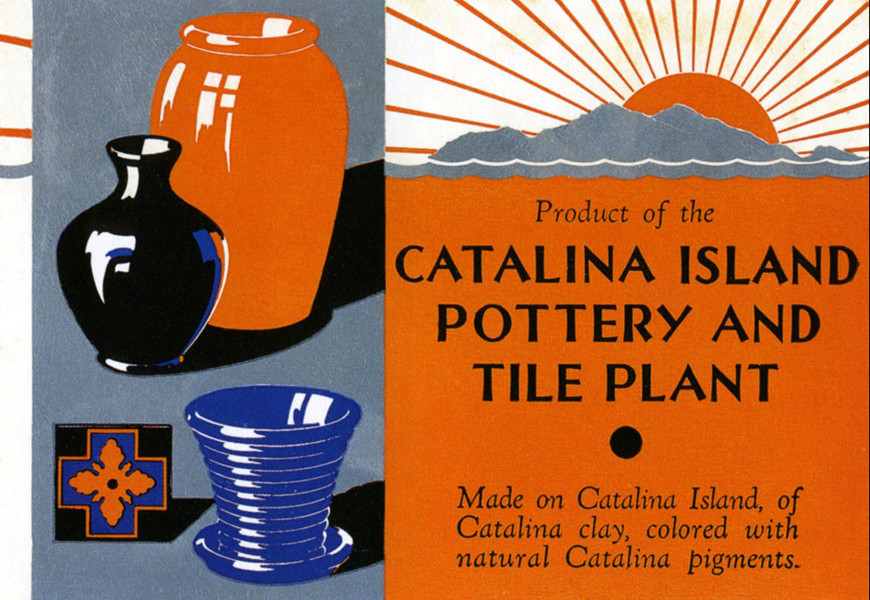
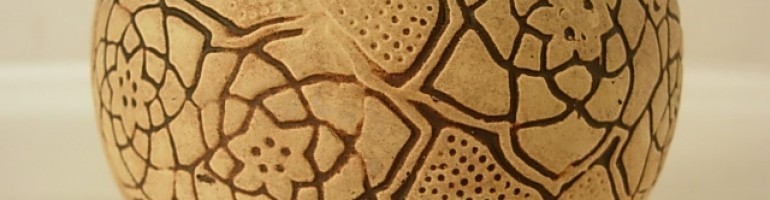
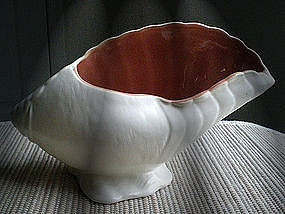
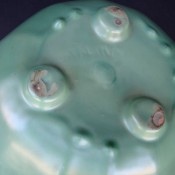
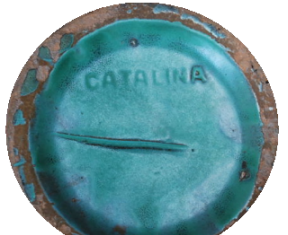
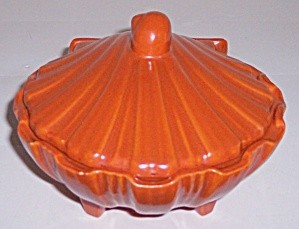
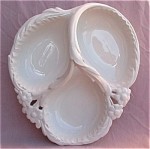
14. CATALINA TILE

Catalina Tile and Pottery 1927 to 1947
Introduction
The Catalina Island Museum is dedicated to collecting, preserving and exhibiting Santa Catalina Island's rich and unique historical and cultural heritage. The tile and pottery that was manufactured
on the Island between 1927 and 1937 is one of the Island's unique historical treasures. The Museum holds a large collection of the pottery and tile and continues to actively collect in this area. We
display a small portion of this collection on a permanent basis, but the small gallery space does not allow for the extensive scope of our collection. Every September, the entire Museum is filled
with Catalina Tile and Pottery and several events are planned throughout the month, such as artist demonstrations, tours of the Island's decorative tile, and a panel discussion featuring historians,
artists, and collectors. Call (310)510-2414 for more information.
The Early Years
In the early 1920s an interesting discovery was made on Santa Catalina Island which led to the development of a new industry for the Island. This industry, although only in operation for a decade,
left a lasting impression on the Island and an indelible mark on the history of California pottery and tile. The clay deposits which were first found by William Wrigley Jr. and David M. Renton
prompted the Santa Catalina Island Company to invest in the development of a brick and tile factory. By 1927 the plant was complete and in full operation. Mr. Wrigley decided that manufacturing
building materials on the Island would drastically reduce his costs on many of his building projects in Avalon, including the Casino building.The first few years of production were focused on
functional building materials, such as bricks and roofing tile. By 1930 Mr. Wrigley and Catalina Clay Products expanded and began producing decorative ware and tile.
The first few years of production were focused on functional building materials, such as bricks and roofing tile. By 1930 Mr. Wrigley and Catalina Clay Products expanded and began producing decorative ware and tile.
By the early 1930s, the tile factory was an impressive operation including artists' studios, research laboratories, molding rooms, kilns, assembling rooms, open air dryers, glazing rooms and laboratories, a cellar, a second story molding room and a substantial storage yard.
Tile and Pottery
Hollow tiles and patio tiles or pavers were the second product line introduced by Catalina Clay Products. The hollow tiles were used for construction and the patio tiles, which found instant
popularity, were used in several buildings and homes in Avalon. The bricks, pavers and roof tiles being produced by the plant continued to be integral to the several construction projects that the
Wrigley's and Santa Catalina Island Company were involved in.
P.K. Wrigley and D.M. Renton saw many advantages in producing decorative tile. The decorative tile would be very important for P.K. Wrigley's plan for the Island's architecture and ambiance which came to fruition in 1934 when he and Otis Shepard redesigned the look of Avalon's Crescent Avenue. Catalina decorative tiles were also used in tile-topped tables, wall hangings, and the occasional lamp or coffee table. These are among the most prized and collectible Catalina Pottery and Tile pieces. Many of the designs used on the tables and other tile products were inspired by the natural beauty of the Island and its creatures.
The most popular and well-known line of Catalina Pottery was Avalonware. Avalonware (also known as Catalinaware) was a line of dinnerware and decorative pottery. For the next several years, beautiful and distinctive colors, stylish forms, good quality and dynamic marketing brought Catalina Pottery to the nation's attention. Shops were established on the Island and on Olvera Street in Los Angeles to sell the popular ware. It was also advertised and retailed in several major department stores across the nation. By the mid 1930s the pottery and tile plant was producing several thousand pieces a week to keep up with the demand.
In order to produce a unique decorative ware known for its quality and beauty, managers recruited several skilled artists. Their influence can be seen throughout the product line from decorative plates to smoking accessories and lamps.
Gladding McBean
By 1937, high operating expenses prompted Mr. Wrigley to sell the molds and the right to the Catalina name to Gladding McBean, a mainland clay products company. Gladding McBean continued to produce
the Catalina line of dinnerware and decorative pottery for ten years. In 1947 the trademark was returned to the Santa Catalina Island Company and the line was phased into Gladding McBean's popular
"Franciscan" line.
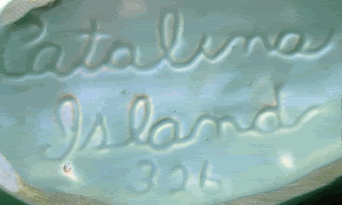
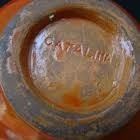
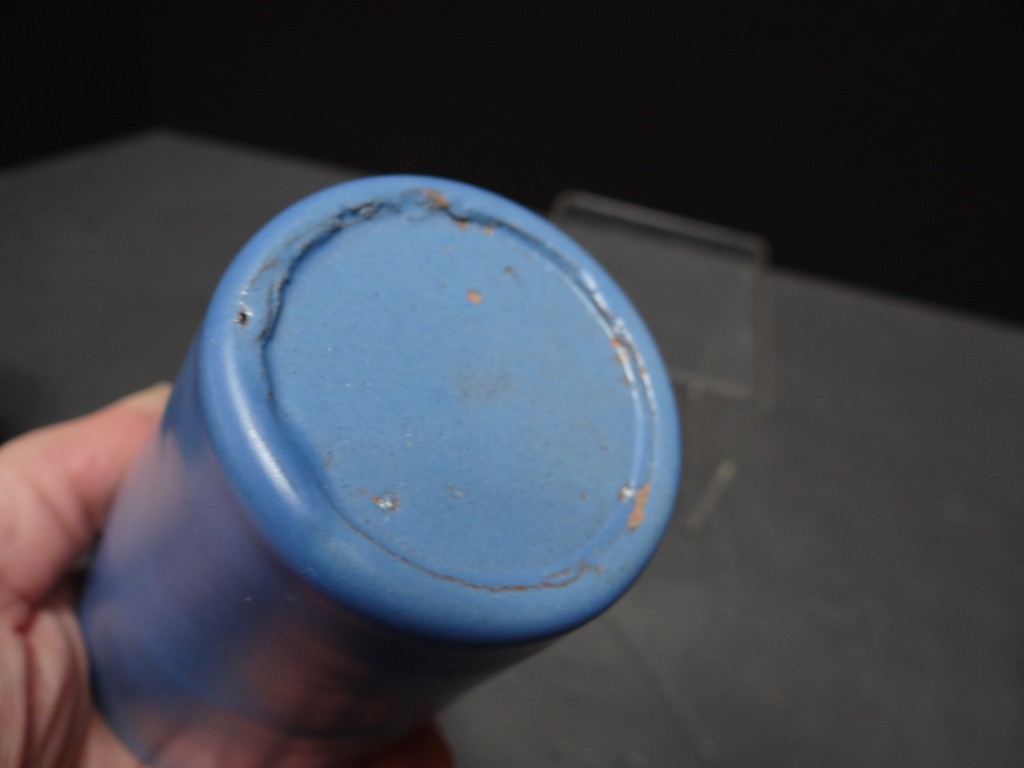
Identification
Decorative tile manufactured by Catalina Clay Products was generally stamped on the back "CATALINA". Since many of the decorative tiles are inset into tables, plaques, and buildings, it is difficult
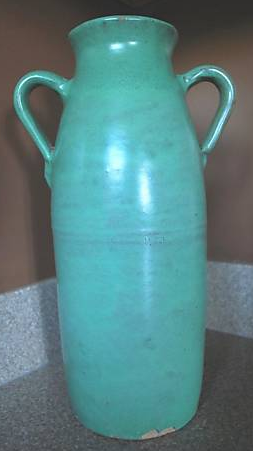
to check the back of the tile. Another identification aid can be the glaze colors. In the early years a few basic colors were commonly used: Catalina Blue, Descanso Green, Black, White, Mandarin
Yellow, Monterey Brown, and Toyon Red. A few years later, light green, light blue, Old Rose, and Orchid were added.
Catalina Pottery manufactured on Catalina Island between 1927 and 1937 is marked on the bottom of most pieces with CATALINA, CATALINA ISLAND, or CATALINA ISLE. These markings were made freehand or with iron stamps, and occasionally with ink stamps. Catalina Pottery made on the mainland by Gladding McBean was marked on the bottom of the piece with CATALINA POTTERY MADE IN U.S.A. or CATALINA RANCHO. These markings were impressed or done in ink.
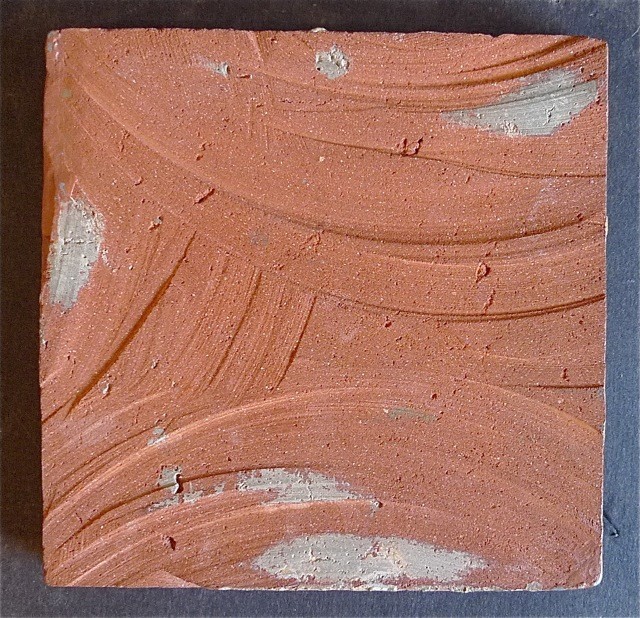
The tile and pottery can also be identified or dated by the color of the clay body. The reddish-brown clay discovered on the Island was used between 1927 and 1932. Products manufactured during
this period will have a red clay body. Beginning in 1932, in an attempt to increase the durability of the products, white clay was imported from Lincoln, California (30 miles Northeast of
Sacramento). The decorative pieces and dinnerware manufactured after 1932 have a white clay body, and some of the decorative tiles have a light red clay body as a result of a mixture of the red and
white clays.
Glaze Colors: Descanso Green, Coral Island,Tourquoise, Toyon Red, Pearly White, Monterey Brown, Beige, Seafoam, Powder Blue, Catalina Blue